Creating a PoC (proof of concept) with Symfony and React Native
Free services
Integrate maps to your sites Editable QR Code after printing Customizable short link Password generator Create images for social networks Create harmonious color palettes Unminify your code Create .gitignore files with ease Restaurant reservation system Booking software for hairdressersIf you're like me, you must have ideas every day for projects to develop, code and implement.
Most of them will never see the light of day and will remain at the idea stage?
But sometimes (fortunately) some of them do become a little more concrete, and for that it can be useful to have a POC.
A what?
The benefits of a POC
A POC stands for Proof of Concept, in other words, a version capable of proving that your concept is functional and can materialize.
In short, it's an ultra-simplified version of your project, whether it's a website or an application. It doesn't necessarily have to have a design or even real functionalities, the aim is just to make your idea concrete so that you can present it to other people who don't have access to your brain?
As an example, today I'm going to show you how to quickly create a mobile application and its API, so you can set up any kind of project base.
BackEnd with API Platform and Symfony
As you can probably guess from our love of Symfony on this blog, it's once again this framework that we're going to use for the "back" part of our application. However, we're going to add an overlay to the framework in order to easily create and manage an API, thanks to API Platform.
This is a set of tools that will automatically generate an API and all its CRUD functions (Create / Read / Update / Delete, i.e. the essential functions for acting on data). Quick and easy to set up, it lets you manage fictitious data to "fill in" your POC and make it look more real.
A little plus in favor of API Platform: it can use GraphQL, a lightweight query language that's very useful for obtaining precise data sets for an application.
How do I set up an API with API Platform?
To get started, you'll first need to have a Symfony instance installed, having followed the official documentation.
Once in place, you can install API Platform with the command :
If you haven't already done so, create the database and schema required for API Platform:
In your Symfony instance, you'll create the entities you need for your project. Users, recipes, household products or blog posts, ...
And once you've migrated, you'll have access to this panel locally?
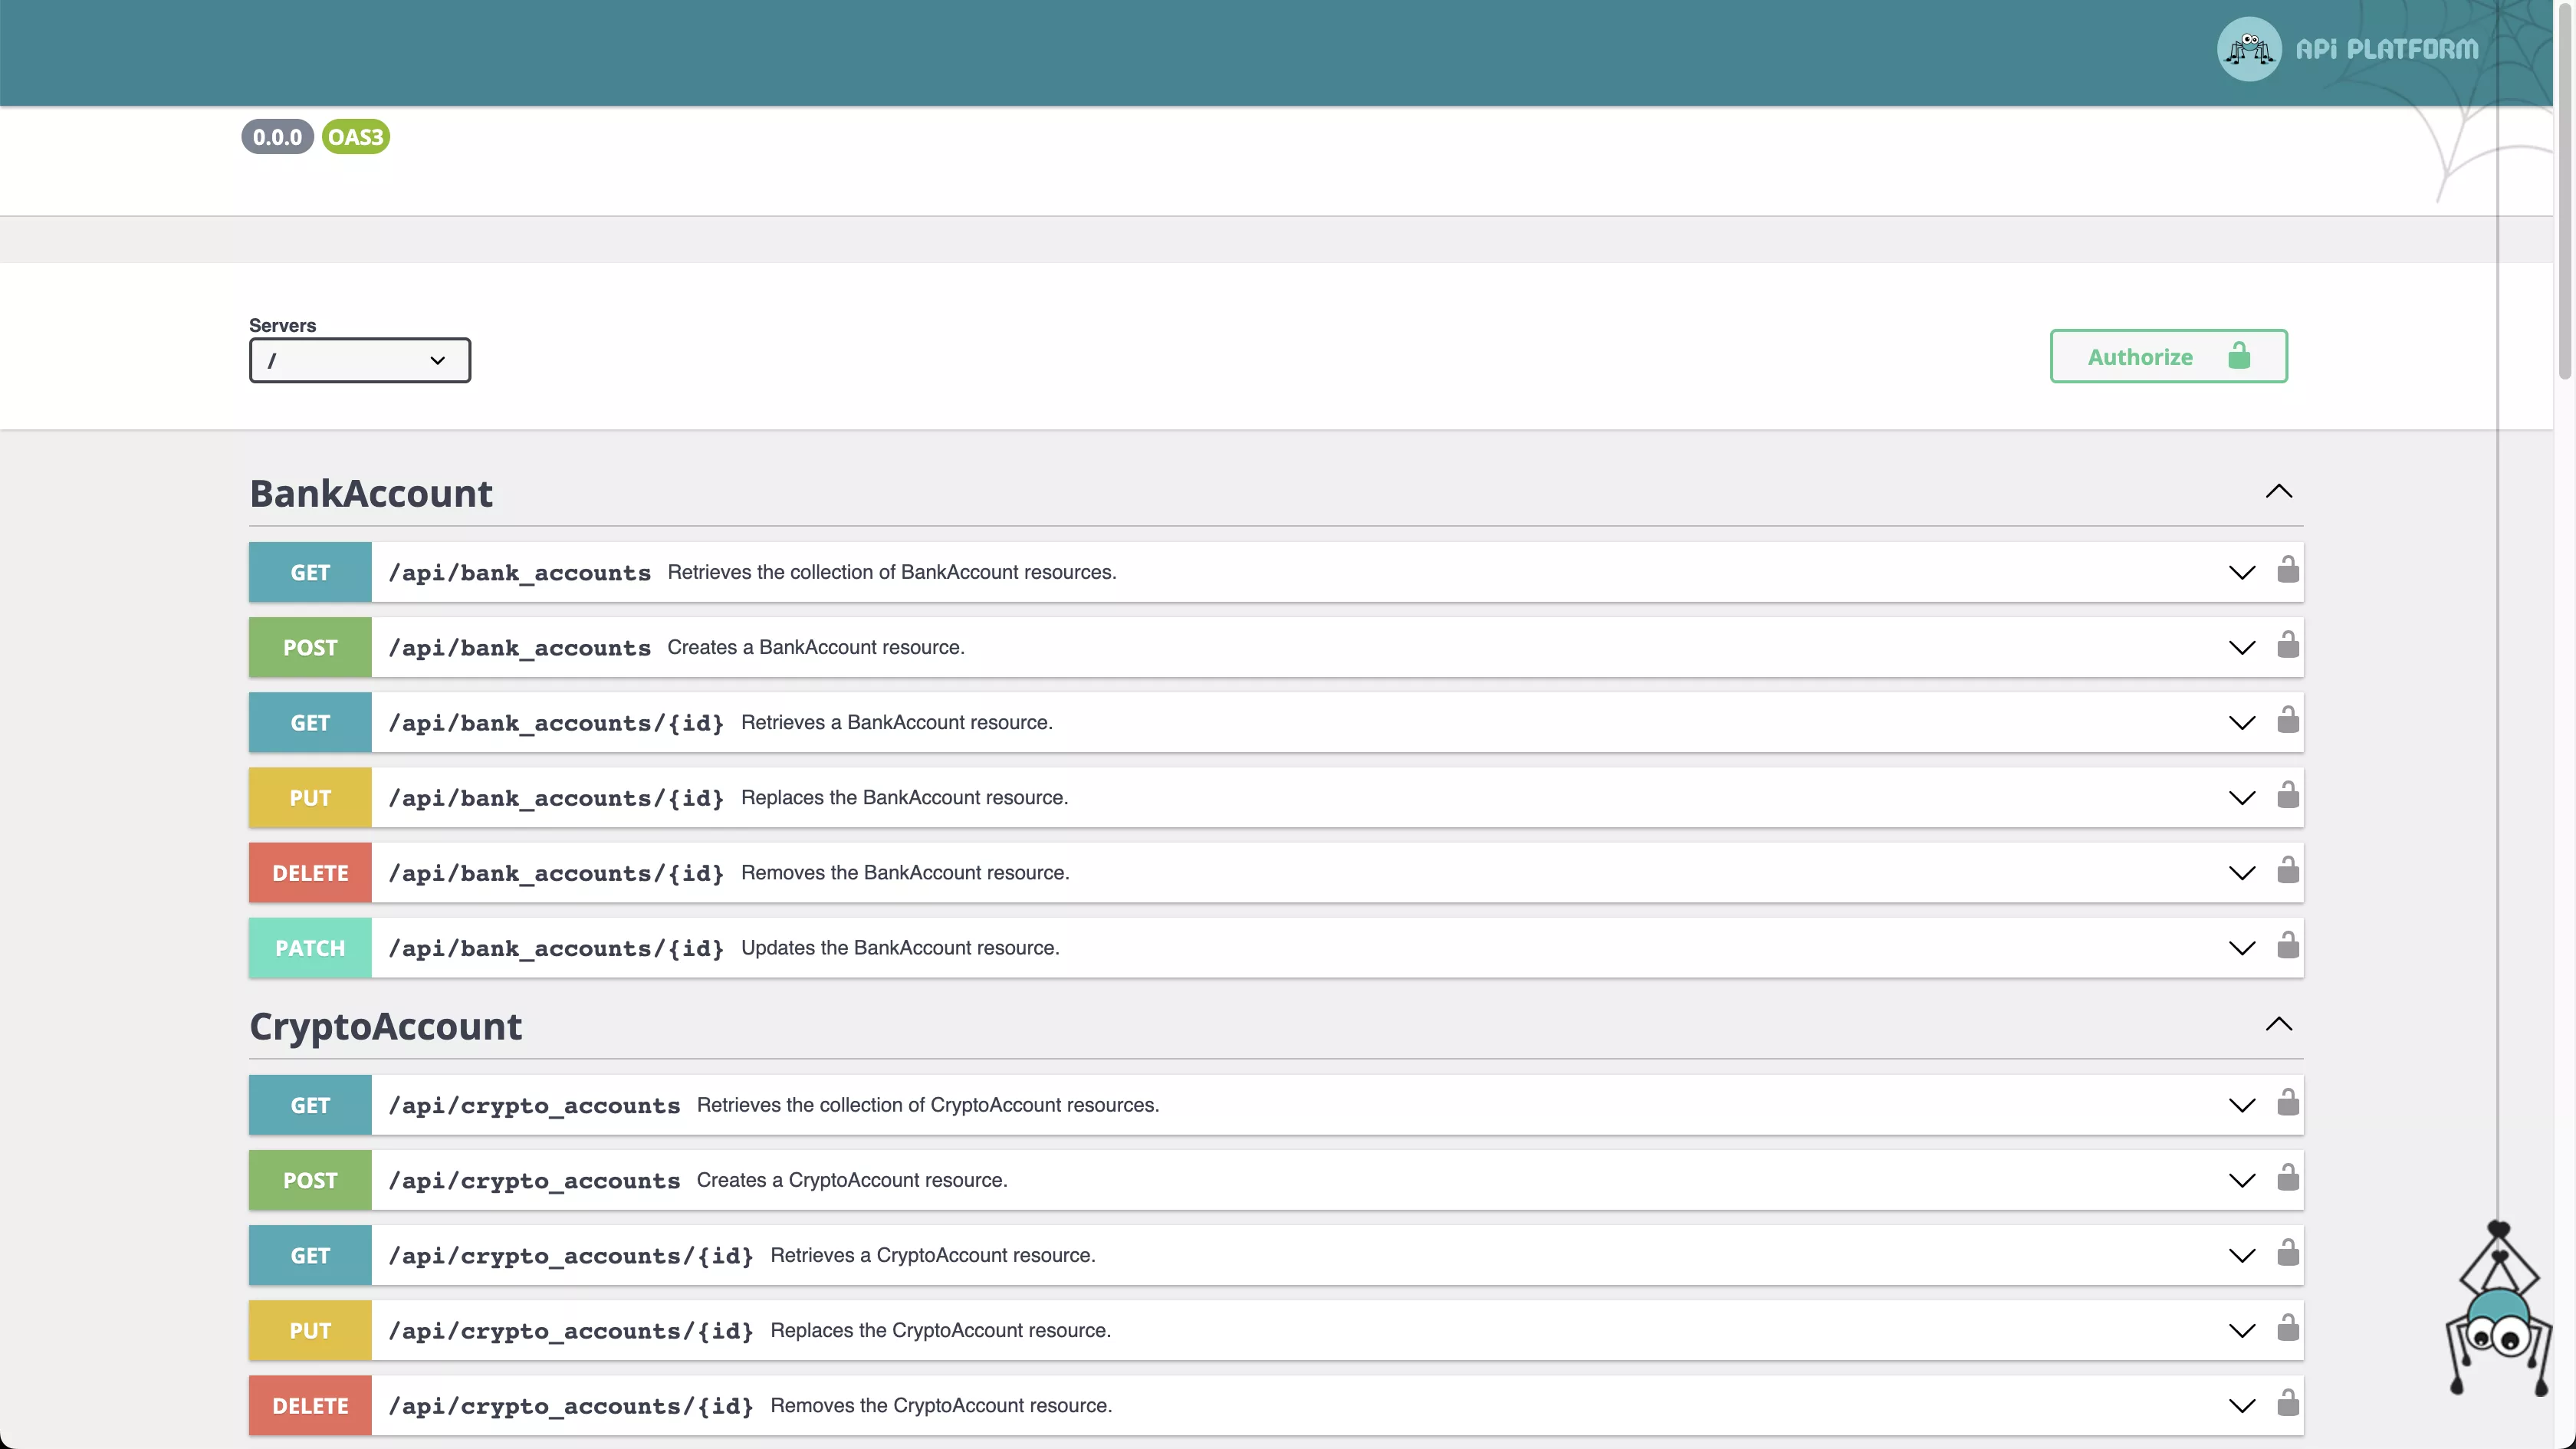
And that's it! Your API has been created, with the routes you need to manage all your entities. I told you it was fast, didn't I?
Okay, that's great, but shouldn't we add a little security?
As I said, we're only creating a POC here, so this code will obviously never be used in production anywhere. Security therefore takes a back seat, as there will never be any sensitive data inside.
Nevertheless, it may be useful to create even a login system so as to have this screen functional in our mobile application later on.
How do I manage API Platform authentication?
To connect to an API, one of the existing methods is to use a JWT Token, a kind of security cookie that we transmit to our API with each request. The token is generated in JSON, making it easy to use and manipulate. A library exists in Symfony to manage this type of token, and is also recommended by API Platform.
So we install this package
Then generate the RSA keys needed to create the tokens.
The second step is to manage authentication under Symfony by configuring the security.yaml file. You'll find all this in the API Platform or Symfony documentation.
Once your firewall and routes are configured, you can try to authenticate or access a protected resource via Postman, for example.
Now, without your token, you can't access the API content - is that what we wanted?
The application with React Native
Let's move on to the mobile side, where I suggest you use React Native, the framework I've already mentioned in a previous article. It's still a reference when it comes to cross-platform development (iOS/Android).
The idea now, as you might expect, is to connect our mobile application to our freshly installed API.
In fact, the principle is very simple: in the same way as you tested with Postman, your application will make requests on the url of your API.
And yes, we're going to include our token this time to make it work?
To create a generic application in RN, I'll leave you to follow the official documentation. I'll be testing it on iOS, but you can use the same code on Android (the magic ?♂️ of cross-platform).
Is your application up and running? Perfect!
Setting up a Login page
The first page of our POC will logically be the Login page, to authenticate users before delivering data from our API.
So we're going to create a basic login form - you can ask dear ChatGPT, he'll do it just fine?
Your home page should then look something like this:
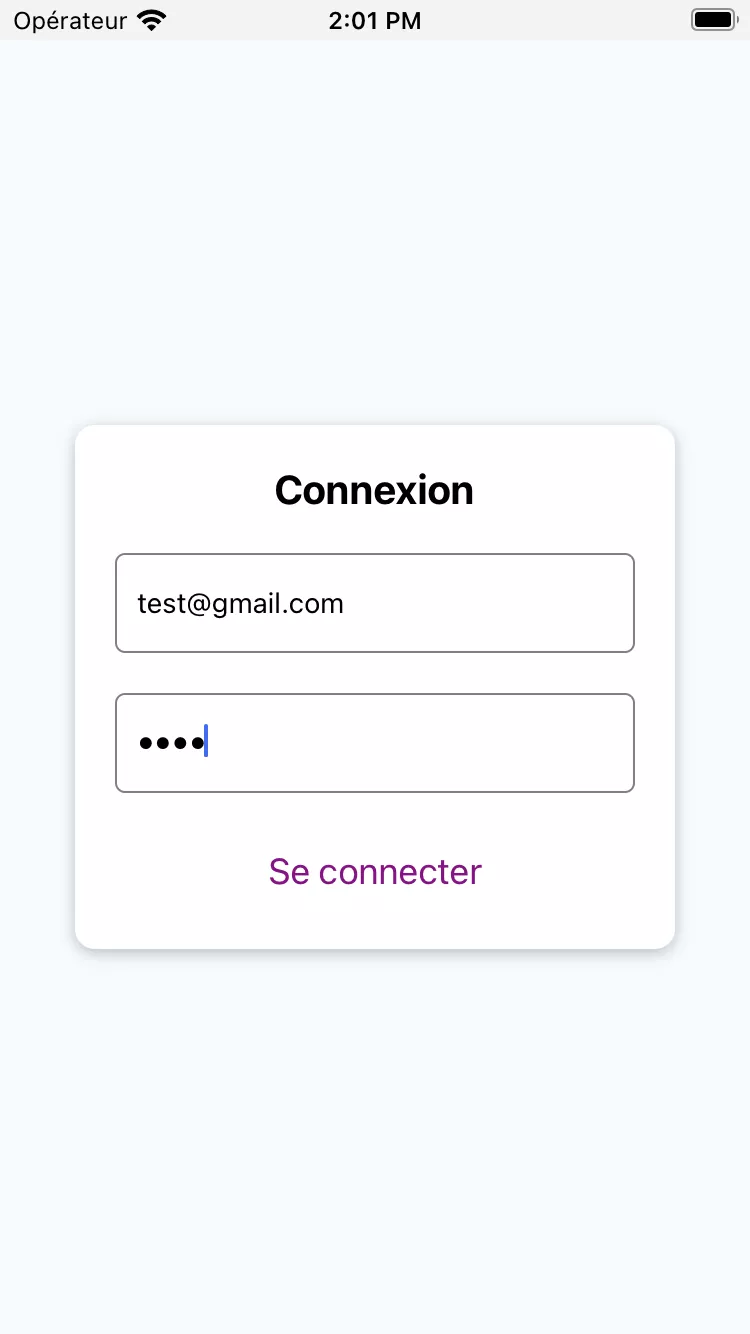
Create a basic function behind the "Login" button via the onPress event, and retrieve the username and password entered by the user.
Making requests to our API
Now the aim is to send all this to our API to obtain the famous sesame: our token.
I recommend you use Axios for this, as it's much easier to use than fetch and also easier to read.
Our code looks like this:
So we test this on the Front end and when you press the Connect button, you should get ... an Axios error, yes yes?
In fact, this is due to the fact that API Platform has https URLs with a self-signed SSL certificate. Which Axios doesn't allow by default because it's not secure.
But in our case, as I said, security isn't paramount, and this code will never go into production as is.
So rather than delving into the native configuration of Axios or API Platform, I recommend a much simpler and faster solution: good old Ngrok?
Ngrok will then have a true SSL signature and Axios will have no problem making requests to it.
Replace the URL in your code and try again - that's it! Your token appears in the console.
Now all we need to do is store this token somewhere, so that we can reuse it for future requests within the API.
To do this, I suggest using Keychain.
Storing and reusing a JWT Token
This is a fairly standard package, which you can install in your application by following the documentation. Once you've done that, you can add these lines to your code.
Your token is now stored in the phone and can be retrieved using :
Then integrate it into your API calls as a Bearer Token :
That's it! Our application is up and running, with basic security and an API to manage all our available data.
Is your POC up and running?