Installing Stable Diffusion with Flux ai locally
Free services
Integrate maps to your sites Editable QR Code after printing Customizable short link Password generator Create images for social networks Create harmonious color palettes Unminify your code Create .gitignore files with ease Restaurant reservation system Booking software for hairdressersSummary
Hello over here 🙂,
Thank you for clicking on this article, I hope you like it 😉.
That's it, it's back to school, so happy? Back to work? What do you mean "you're still on the beach"? That's not going to be possible 😛.
For this article, we're going to talk about artificial intelligence... eh yes! finally.
Why this article
As always, a little explanation of the adventure that led us to this article, a little background
An article on AI now?
Well, Ludo, were you asleep?
It's true that on the blog, I haven't really talked to you about AI yet, there's an article on GPT prompt management with macOS, but we've never really talked about AI, so have I been in a cave for the last three years?
Well no, not at all... in fact I've spent a lot of time (and long nights) playing with LLMs, image generation models ... etc..
Except that... I couldn't find anything really interesting to tell you about it, as there are already plenty of articles on the web dealing with all this: ChatGPT, Midjourney ... etc.
So I didn't write anything about it, and focused on more exotic stuff - before the vacations, we were talking cow! It's more fun, isn't it? 😁.
It all starts with a tweet on a Sunday afternoon
It's late August, Sunday August 25, 2024, to be precise... As far as I'm concerned, I'm back from vacation, but we're in an off-peak period, customers are still on vacation... in short, nothing's moving and I'm a bit bored, I feel like working on some crazy stuff again myself 😮.
So I write this Tweet:

I tweet "Shall we have a belote?", basically it just means "we're bored as hell, shall we do something?". Before publishing, I say to myself, "Hey, why don't I add an image of a prompt burst on the ground on Midjourney?".
I do it and I don't even look at the result, I just tweet directly, and, well, you've seen the result: shattered on the ground. So I reply directly (to my own tweet, yes I'm like that) "Here, Midjoruney did some dingueries 😮".
This had the effect of creating a conversation with a super nice guy, I named Benjamin Cherion.
You can follow the conversation here.
He asks me if it wasn't better with Flux, I'd only heard of names, but I remembered that Grok, Elon Musk's "chatGPT" uses Flux to generate images...
I test it, and indeed, the result is incredible!

Yes, yes, I didn't change anything in my ground burst prompt, I just switched from Midjourney to Flux...
Here I am, scouring the web to see "what's Flux"? Flux is a model that can be used with Stable Diffusion.... but ... A few months ago, a friend of mine, the best pig, told me about it. At the time, I took note of it, but I hadn't had time to test it...
While continuing the conversation with Benjamin, in particular about possible APIs that would give access to Flux, I start poking around on the net, wanting to know more.
(Ah, now I'm not bored, I've got something to occupy my Sunday afternoon 😛)
What is Flux AI?
Flux AI is an artificial intelligence model for image generation, developed by Black Forest Labs and open source (at least the "dev" and "schnell" versions). It's very powerful (no, but really).
The fact that it's open source means, among other things, that you can run it on your own hardware - yes, I swear you'll be able to make your RTX 4090 pay for itself 😛.
Installing Flux AI with Stable Diffusion
First and foremost, this part is largely inspired by this article: installing Flux in under 10 minutes.
He did a great deal of research and made my life much easier...
On which platform are we going to install all this?
As far as I'm concerned, I've installed it on two different platforms, one successfully and the other ... less so.
- A PC running Windows 11 with an RTX 2070 (with 8 GB of video memory).
- A 2023 Macbook Pro M3, with 36GB of unified memory.
That's why, in the screenshots in this article, you'll sometimes see macOS and sometimes Windows - I don't have a machine with a graphics card and Linux to hand, sorry...
Installing StabilityMatrix
StabilityMatrix is a great tool, it allows you to install what you need to use Stable Diffusion without any hassle.
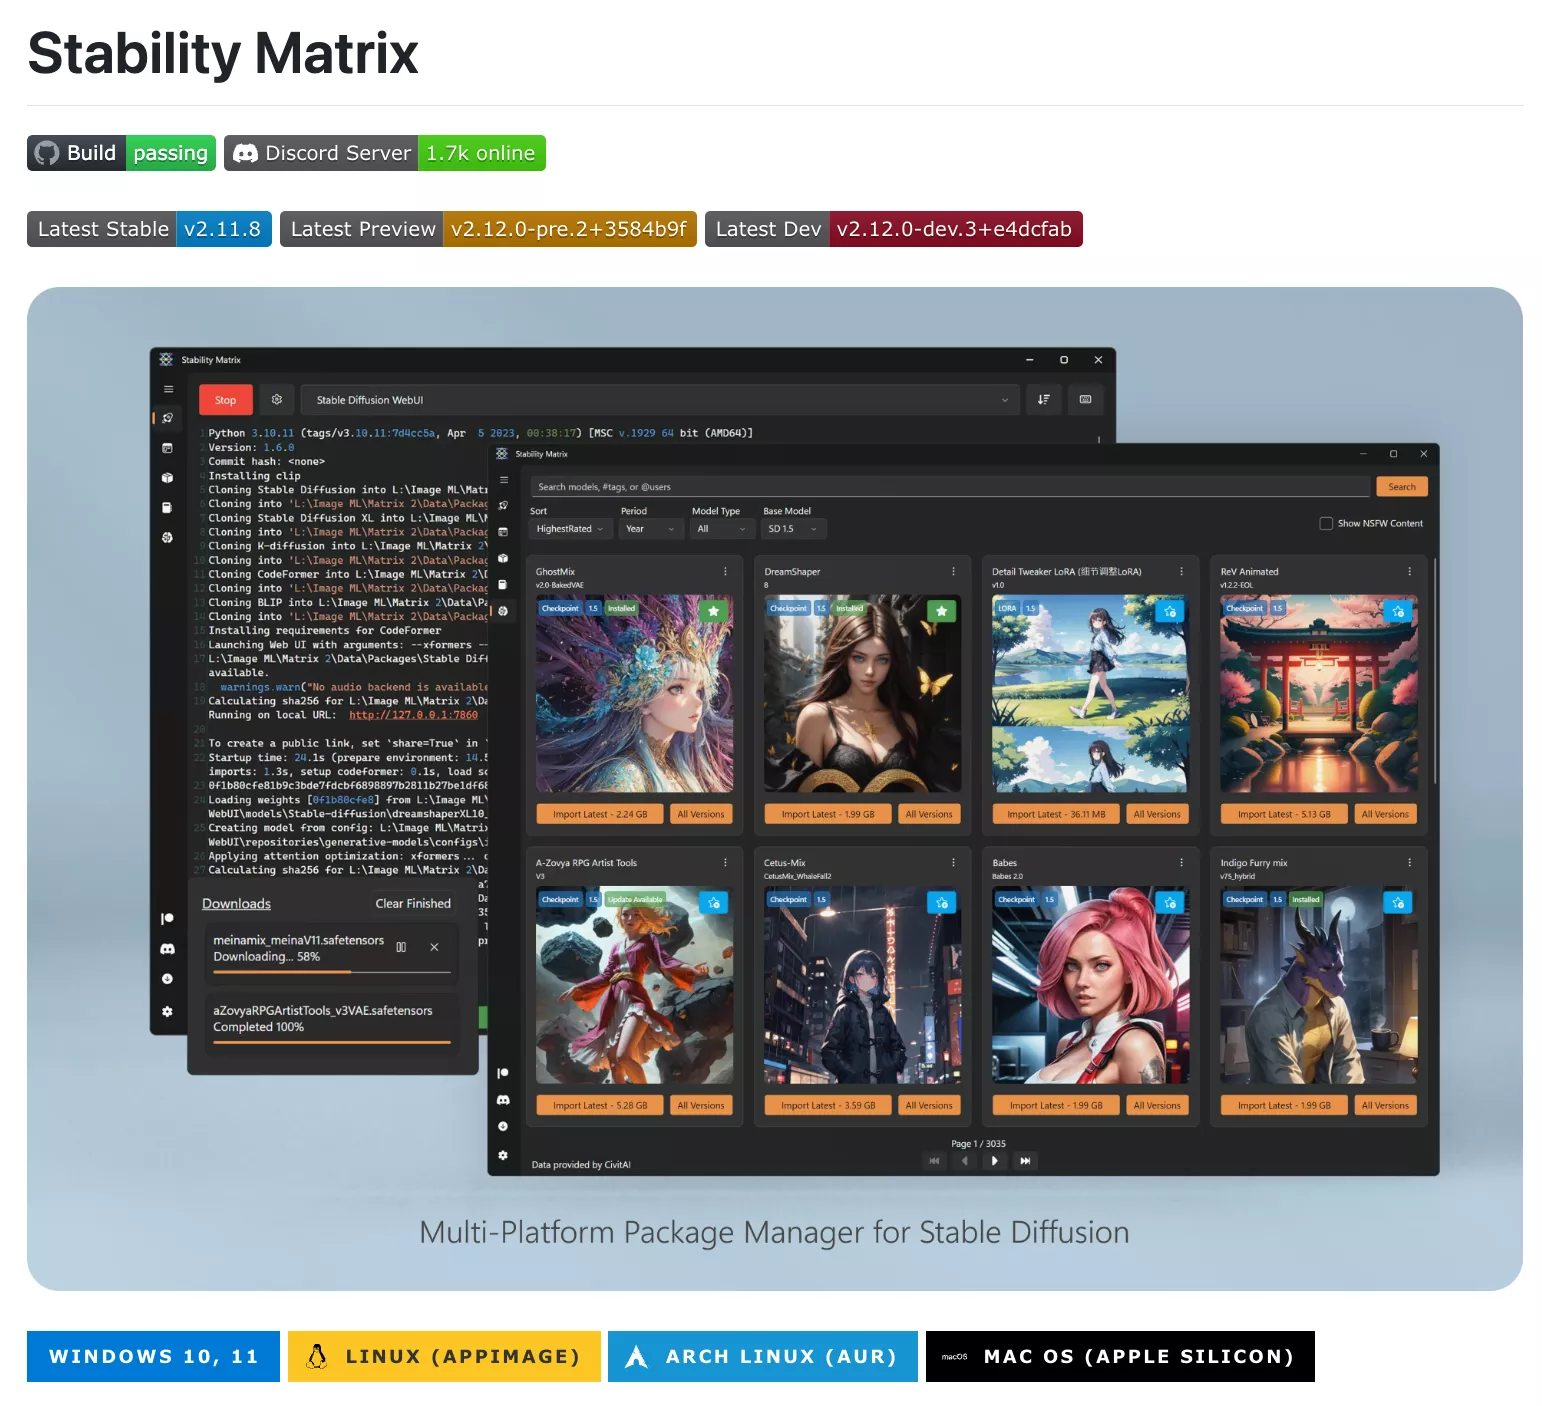
To get started, go to the project's GitHub page and download the binary that corresponds to your platform.
On macOS, it's a straightforward installation: just drag the ".app" into your /Applications folder.
For Windows, I'd like to draw your attention to the fact that it's best to unzip the ".exe" and put it in a folder where you won't move it again, as this will simplify your life later on.
Launching StabilityMatrix for the first time
Start the application and the first window will look like this:
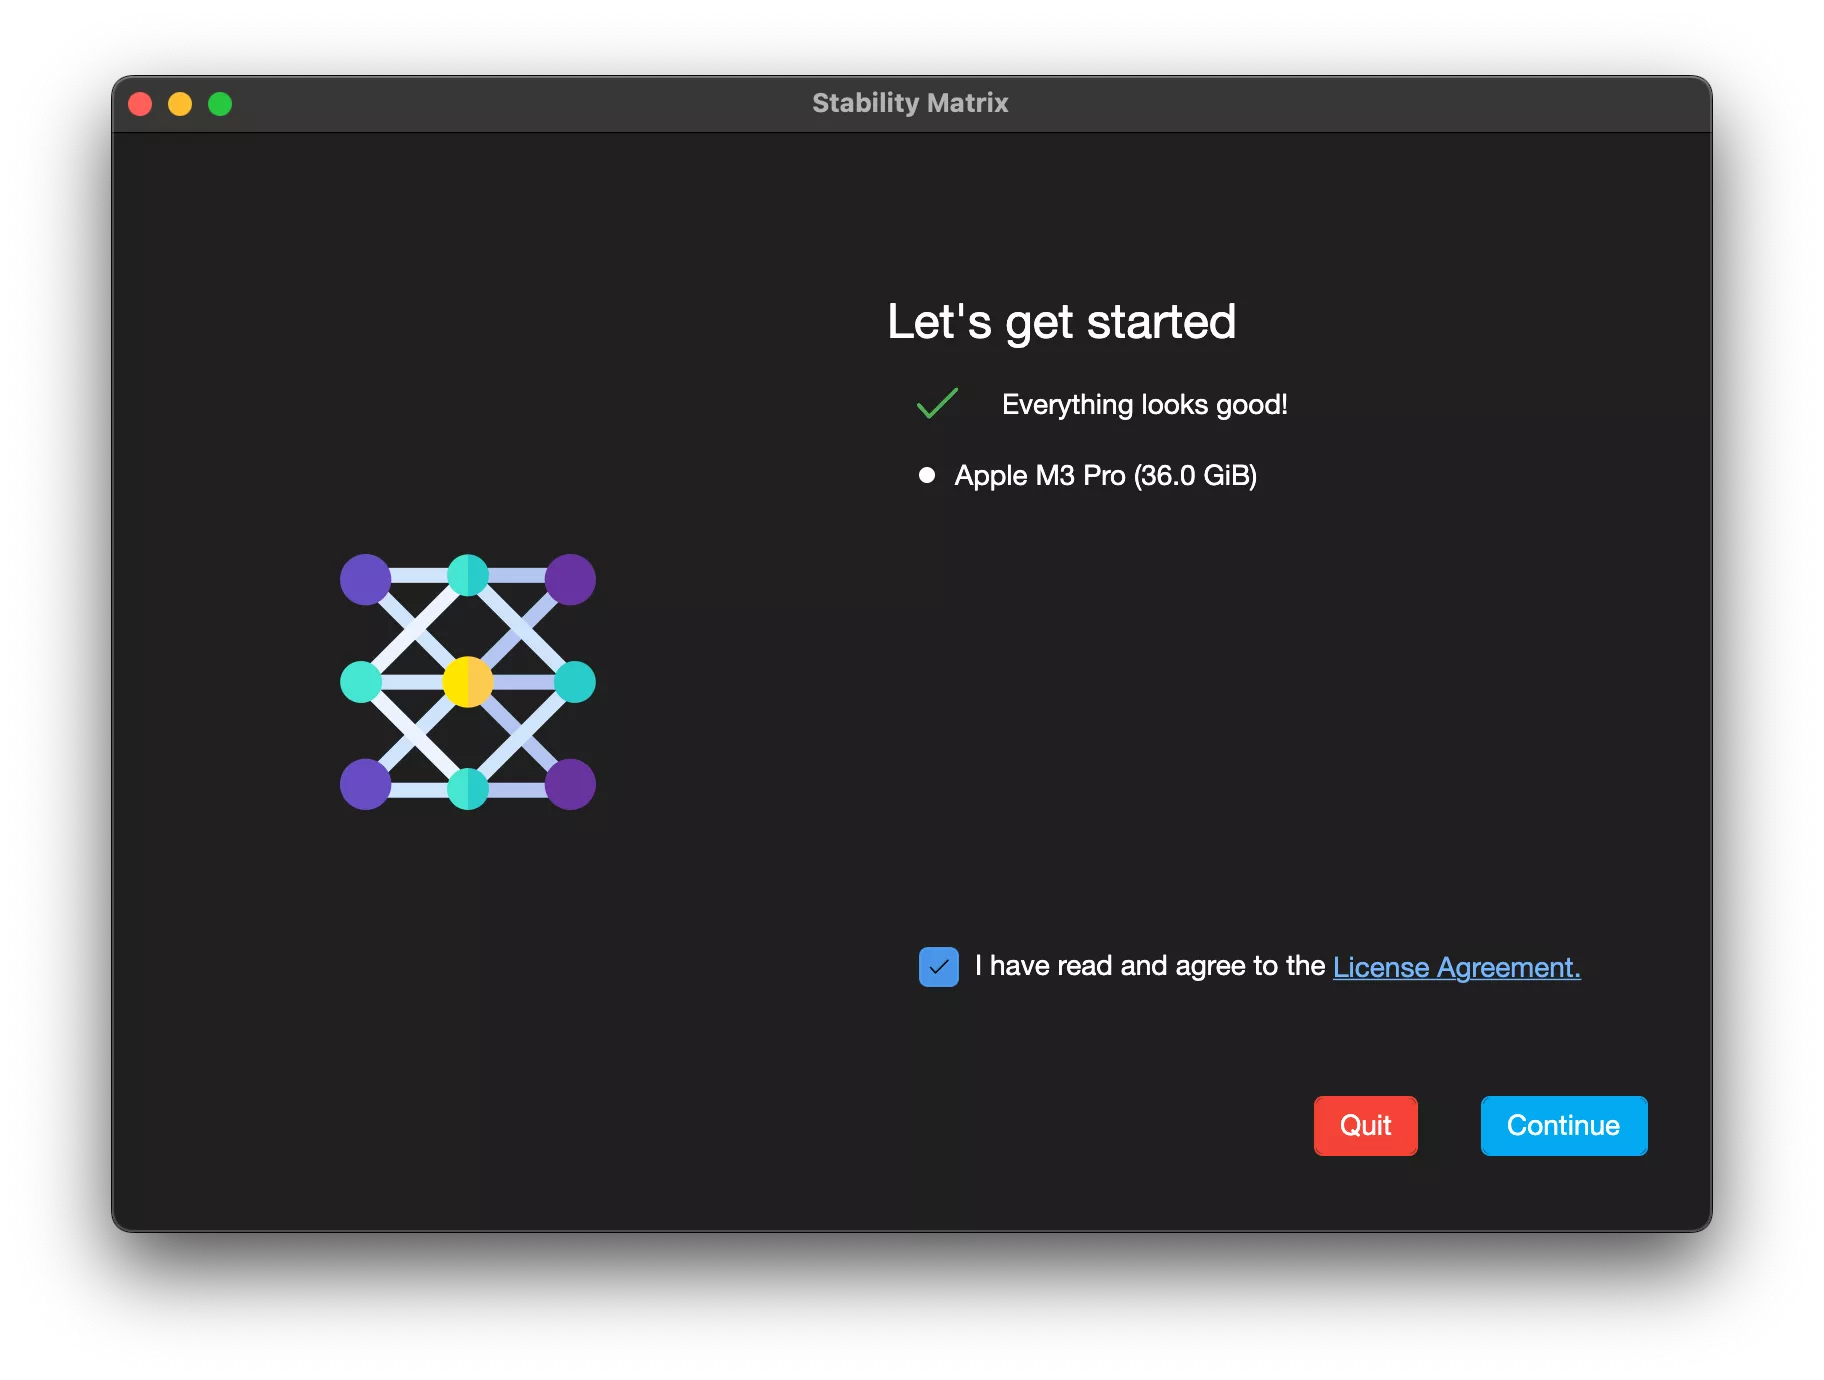
This first screen asks you to check that you're "ok" with the conditions of use, and checks whether your hardware is compatible... On the screenshot it detects an Apple Silicon M3 Pro SoC, I confirm, that's it 😁.
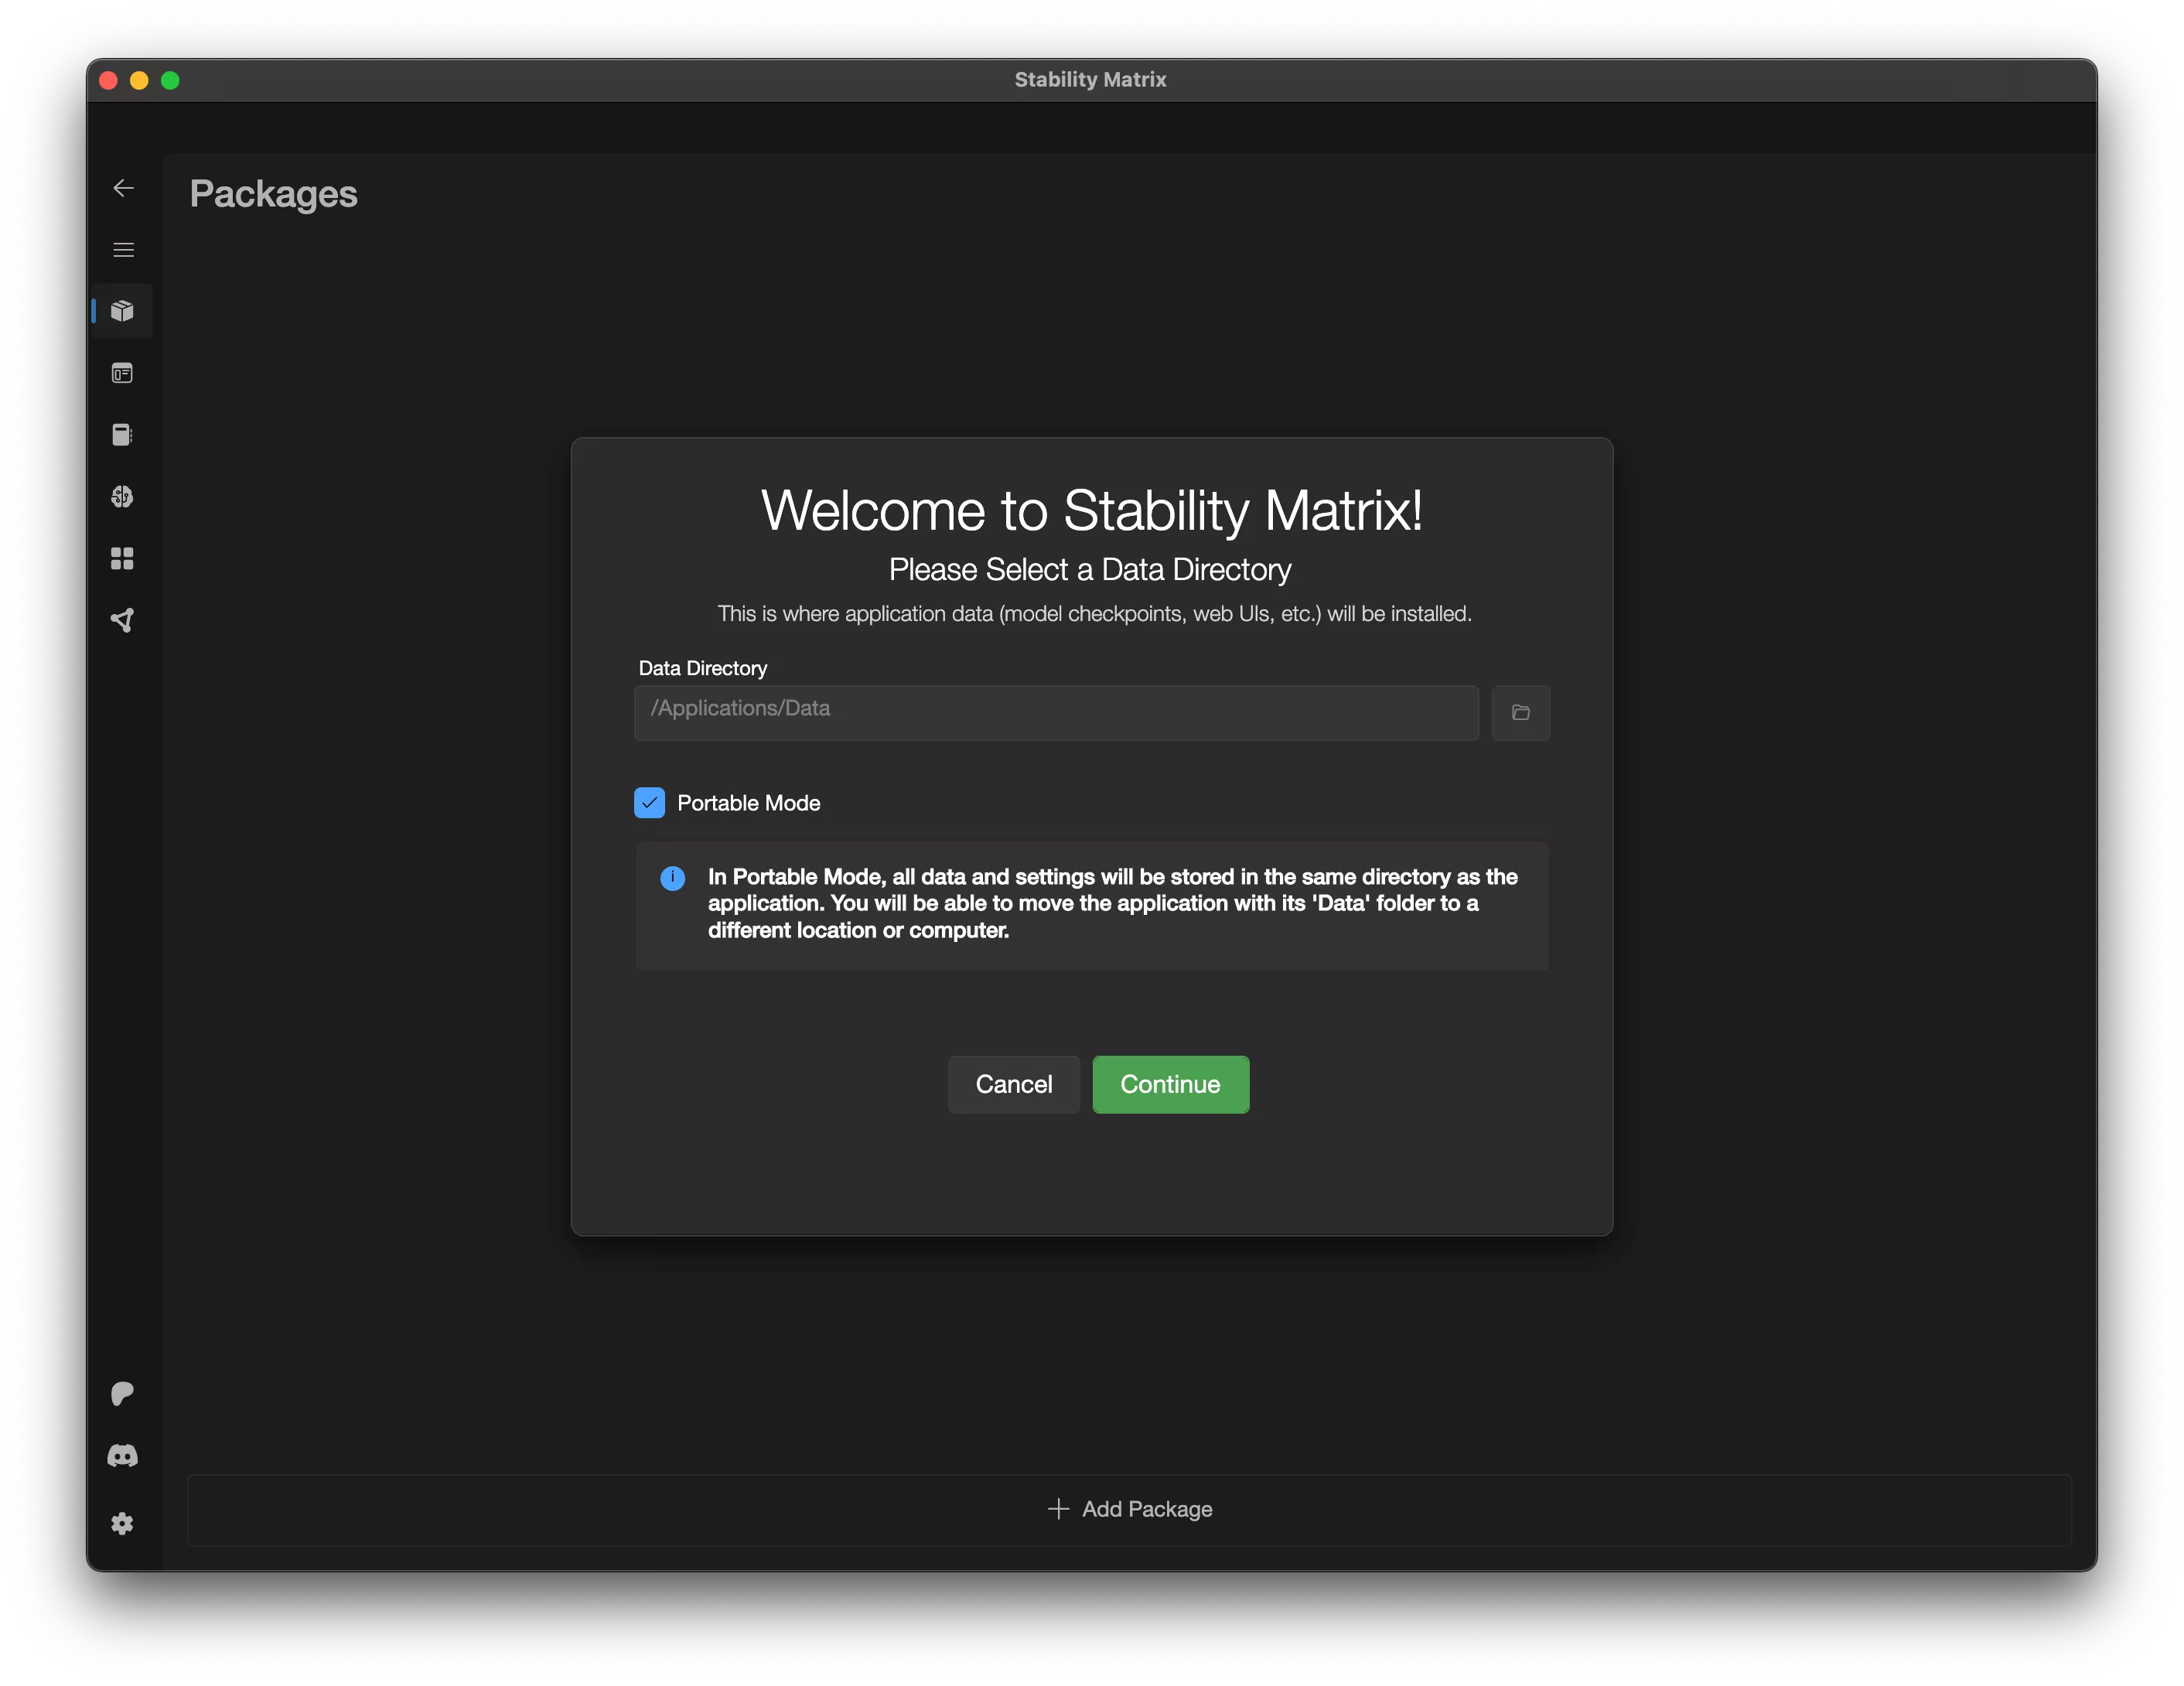
Warning: This step is important for what's to come, as we're going to need to add things to "data", from StabilityMatrix, so I advise you to activate the portable mode. This way, you'll have the "Data" folder next to the "StabilityMatrix" binary.
That's why, on Windows, I told you to unzip the executable before launching it 😁.
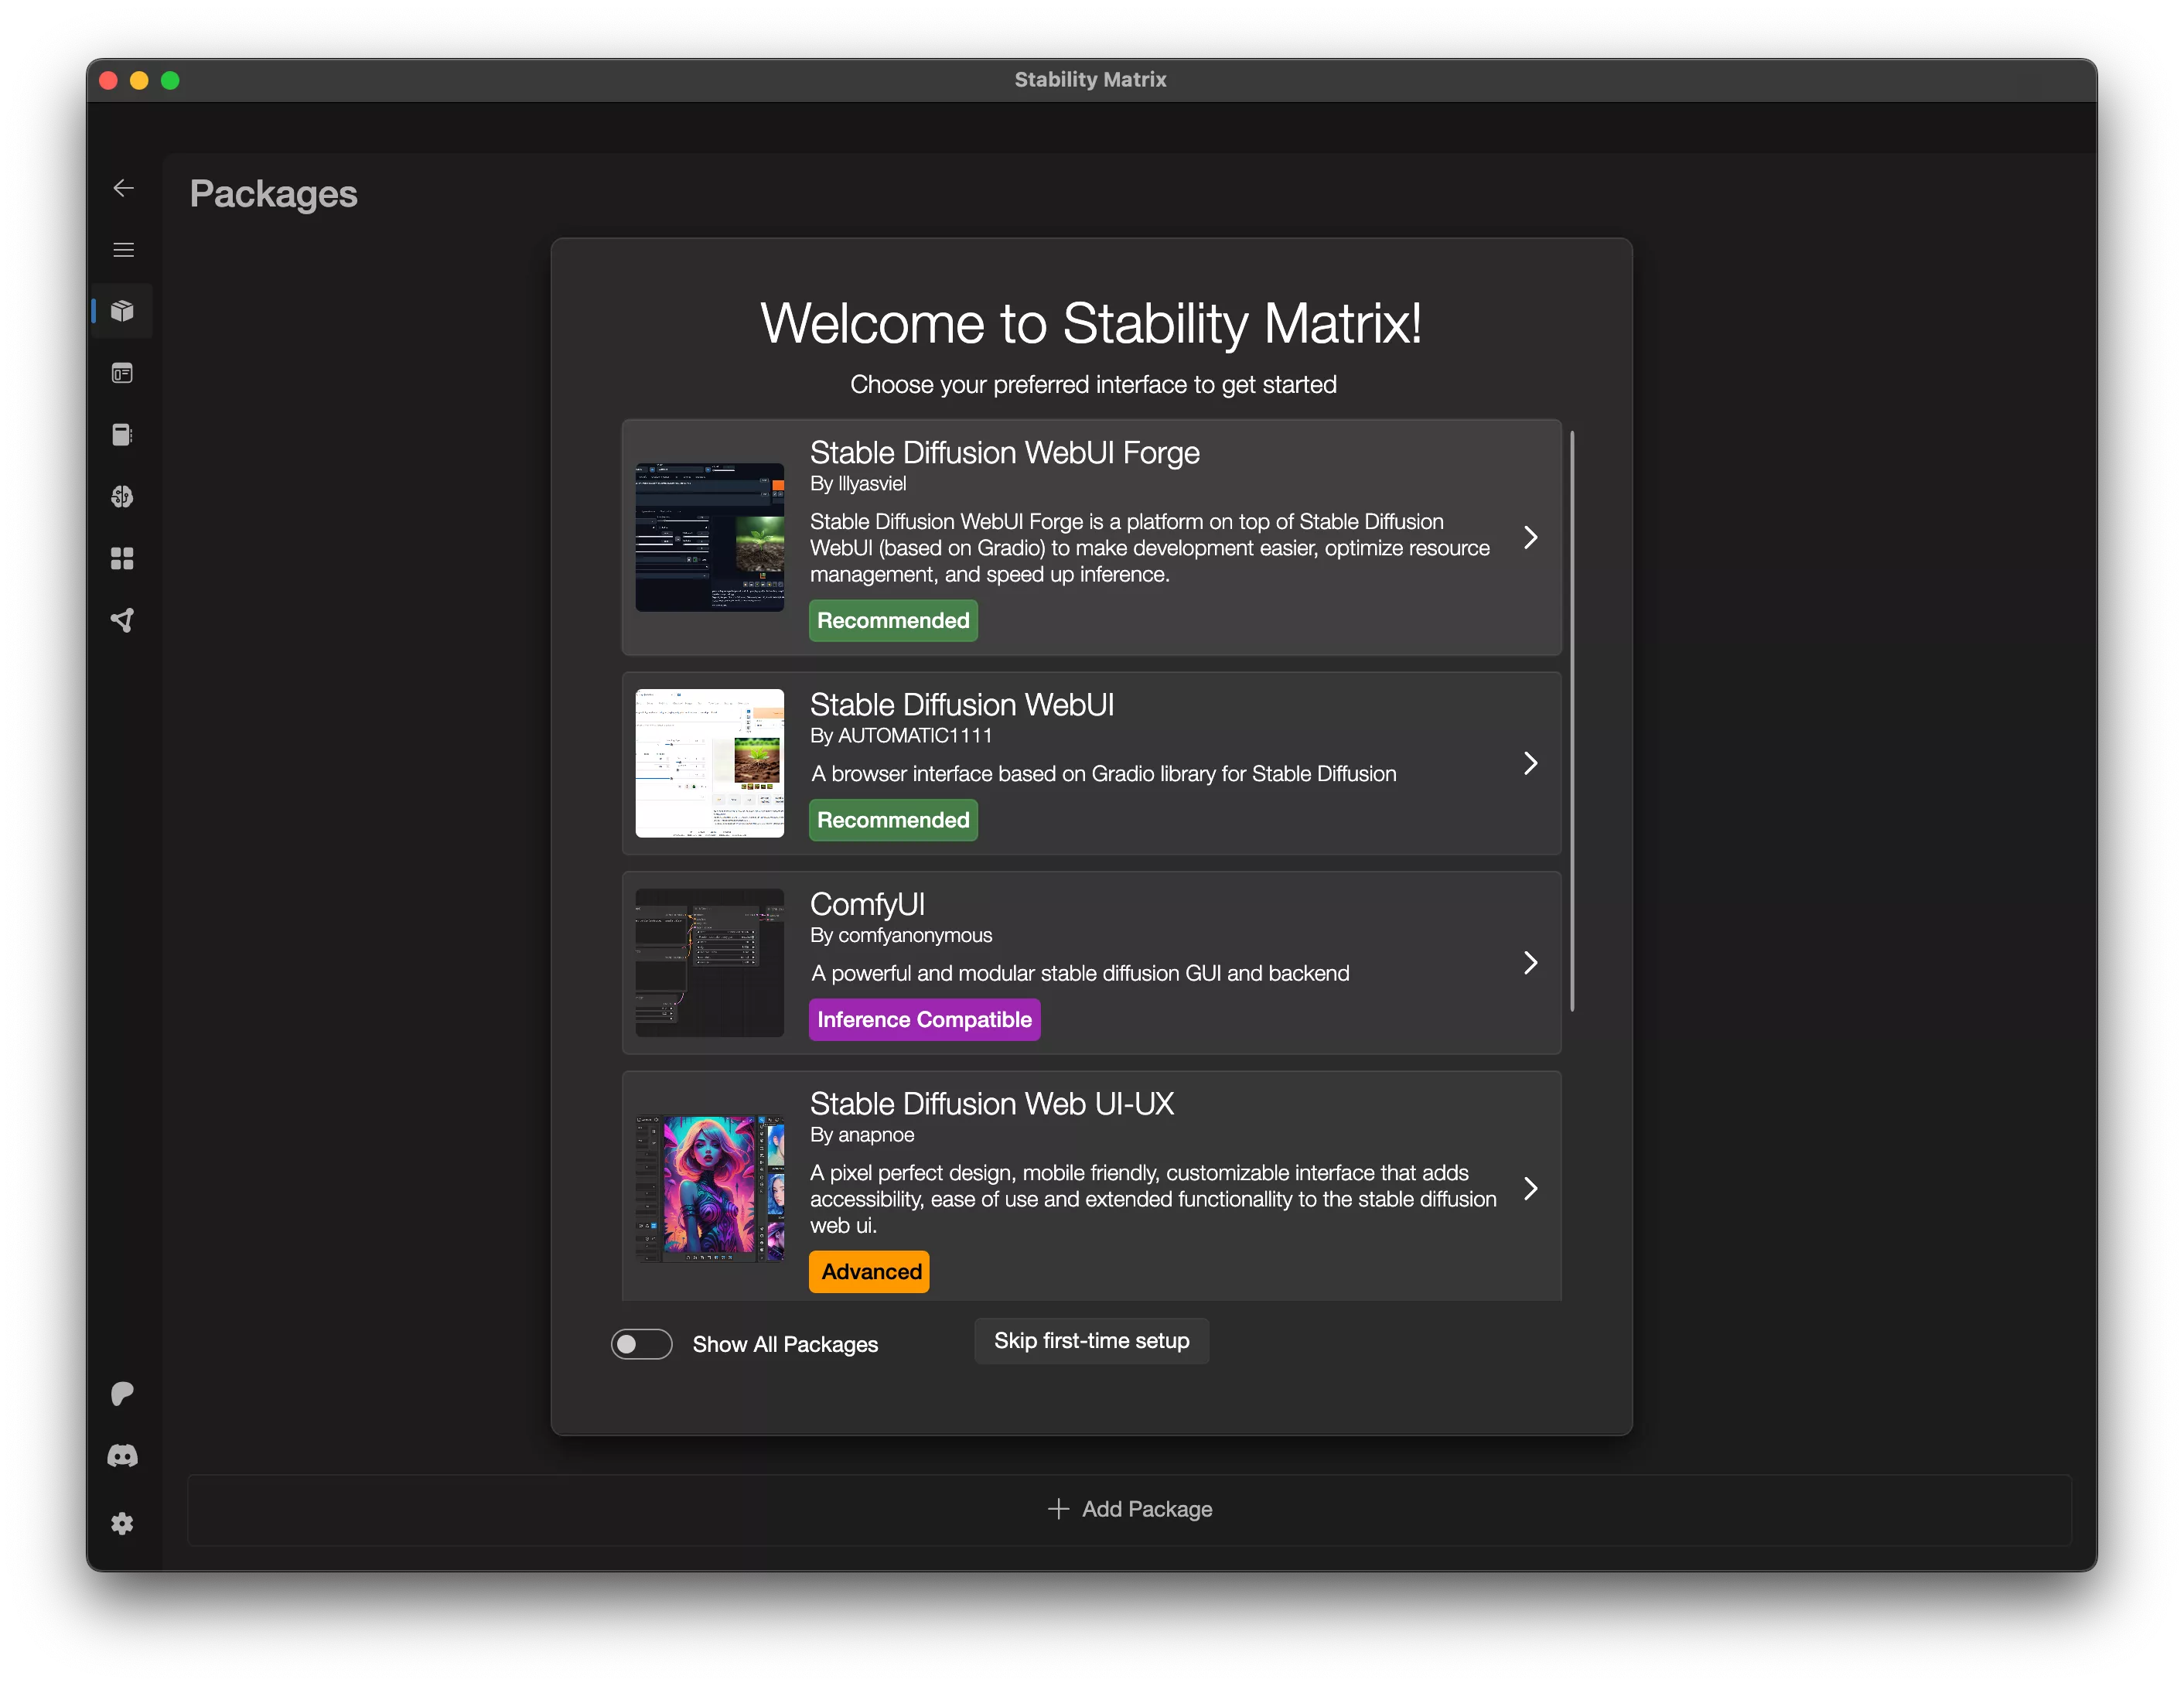
Hop, hop, hop, let's stop here, and install "Stable Diffusion WebUI Forge", taking care to use the Forge.... version.
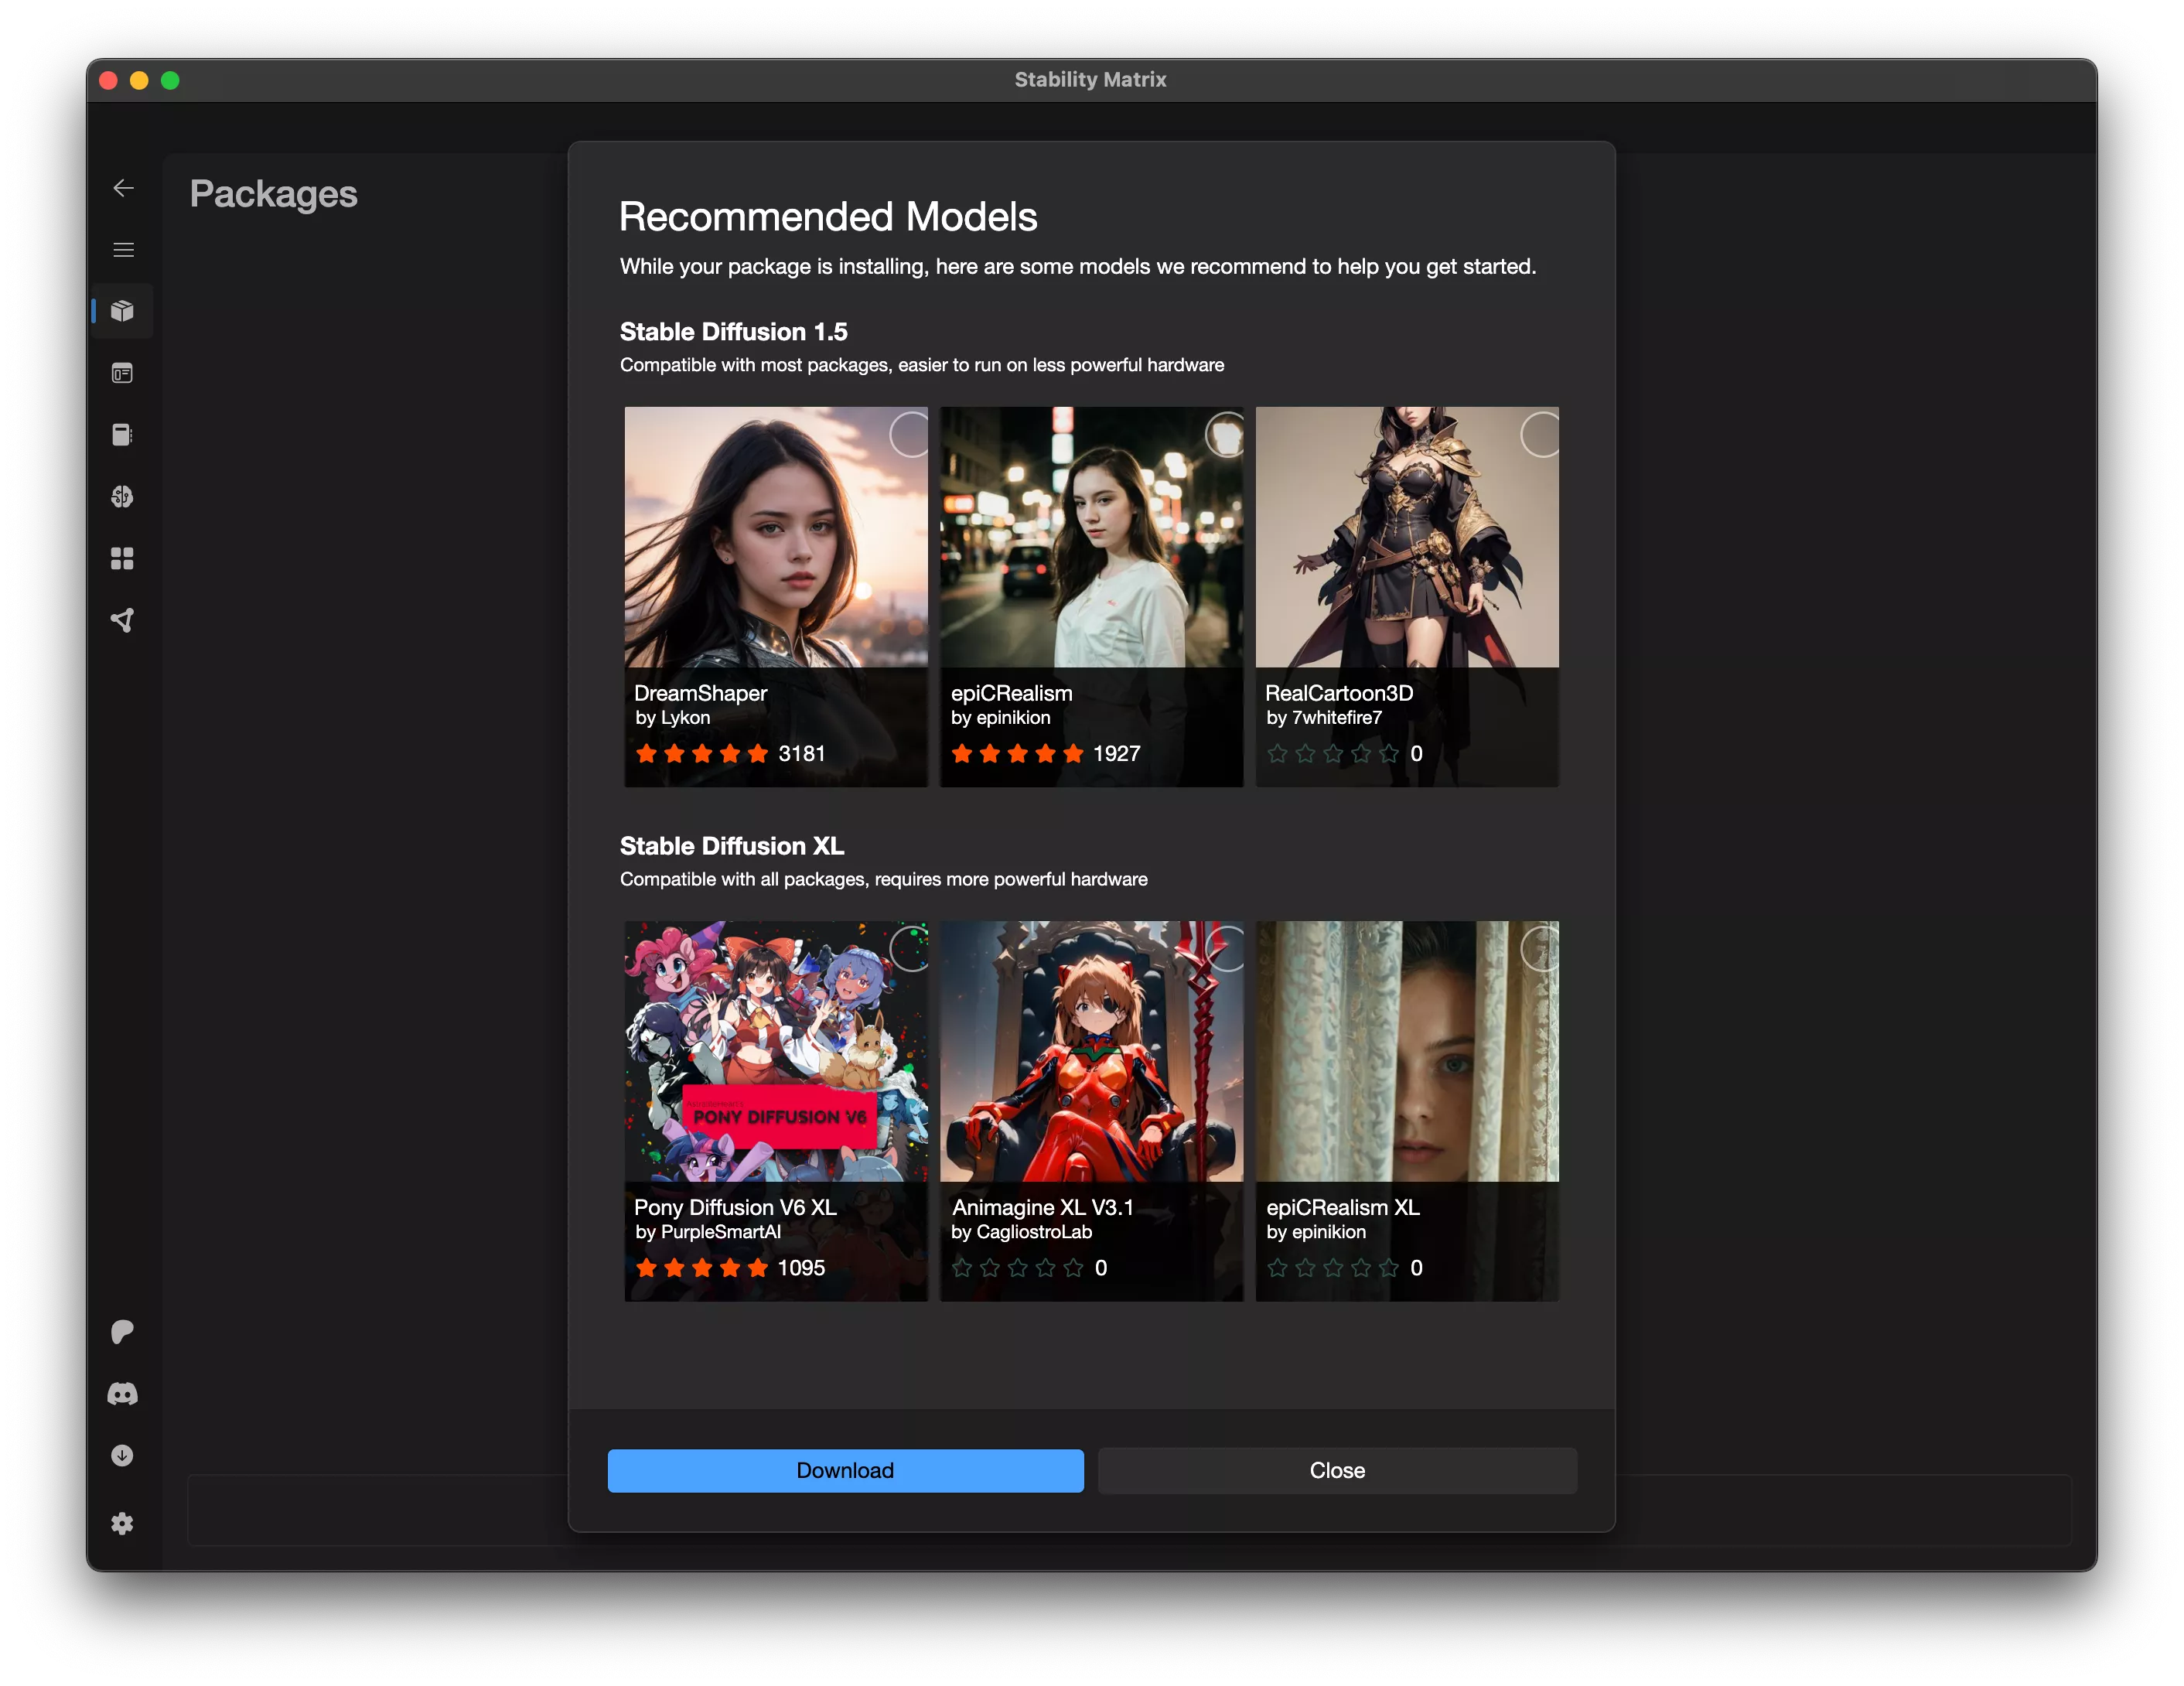
During the StabilityMatrix installation process, you offer to install additional templates, which you can have a look at. As far as I'm concerned, I didn't install any others, as I wanted to test Flux, Flux and Flux.
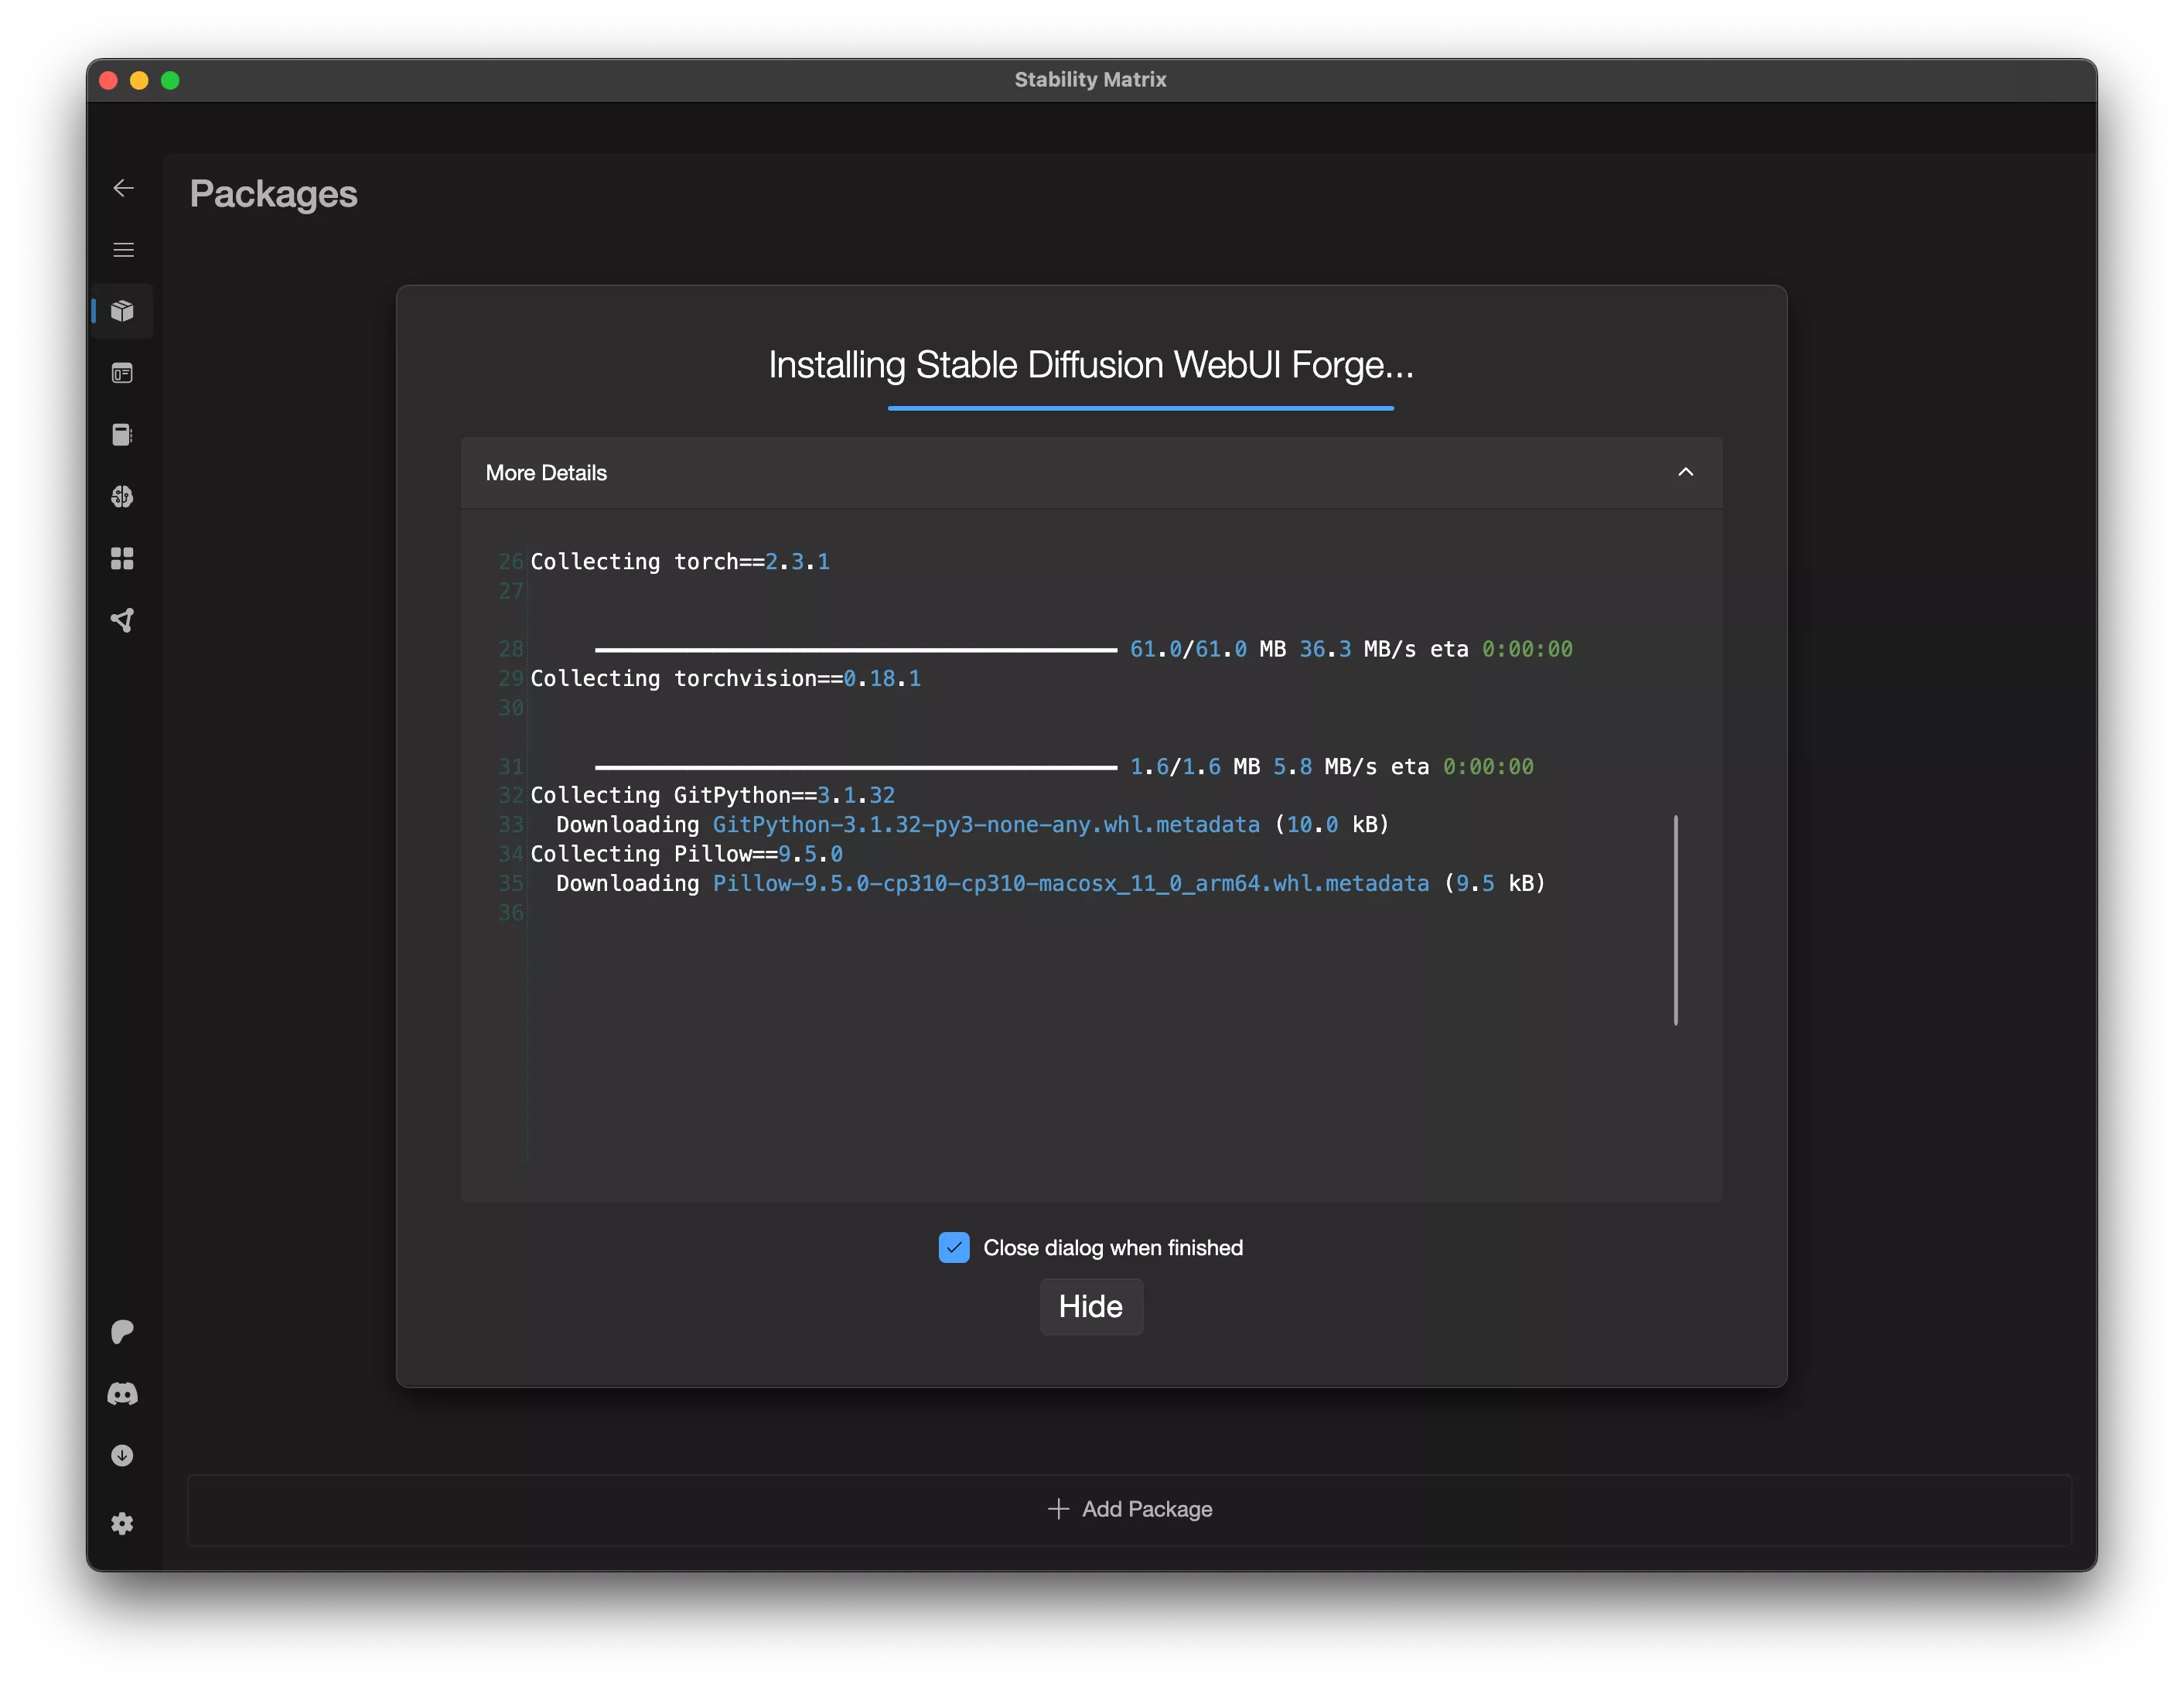
Now you just have to wait... it will download and install everything you need to use Stable Diffusion UI Forge...
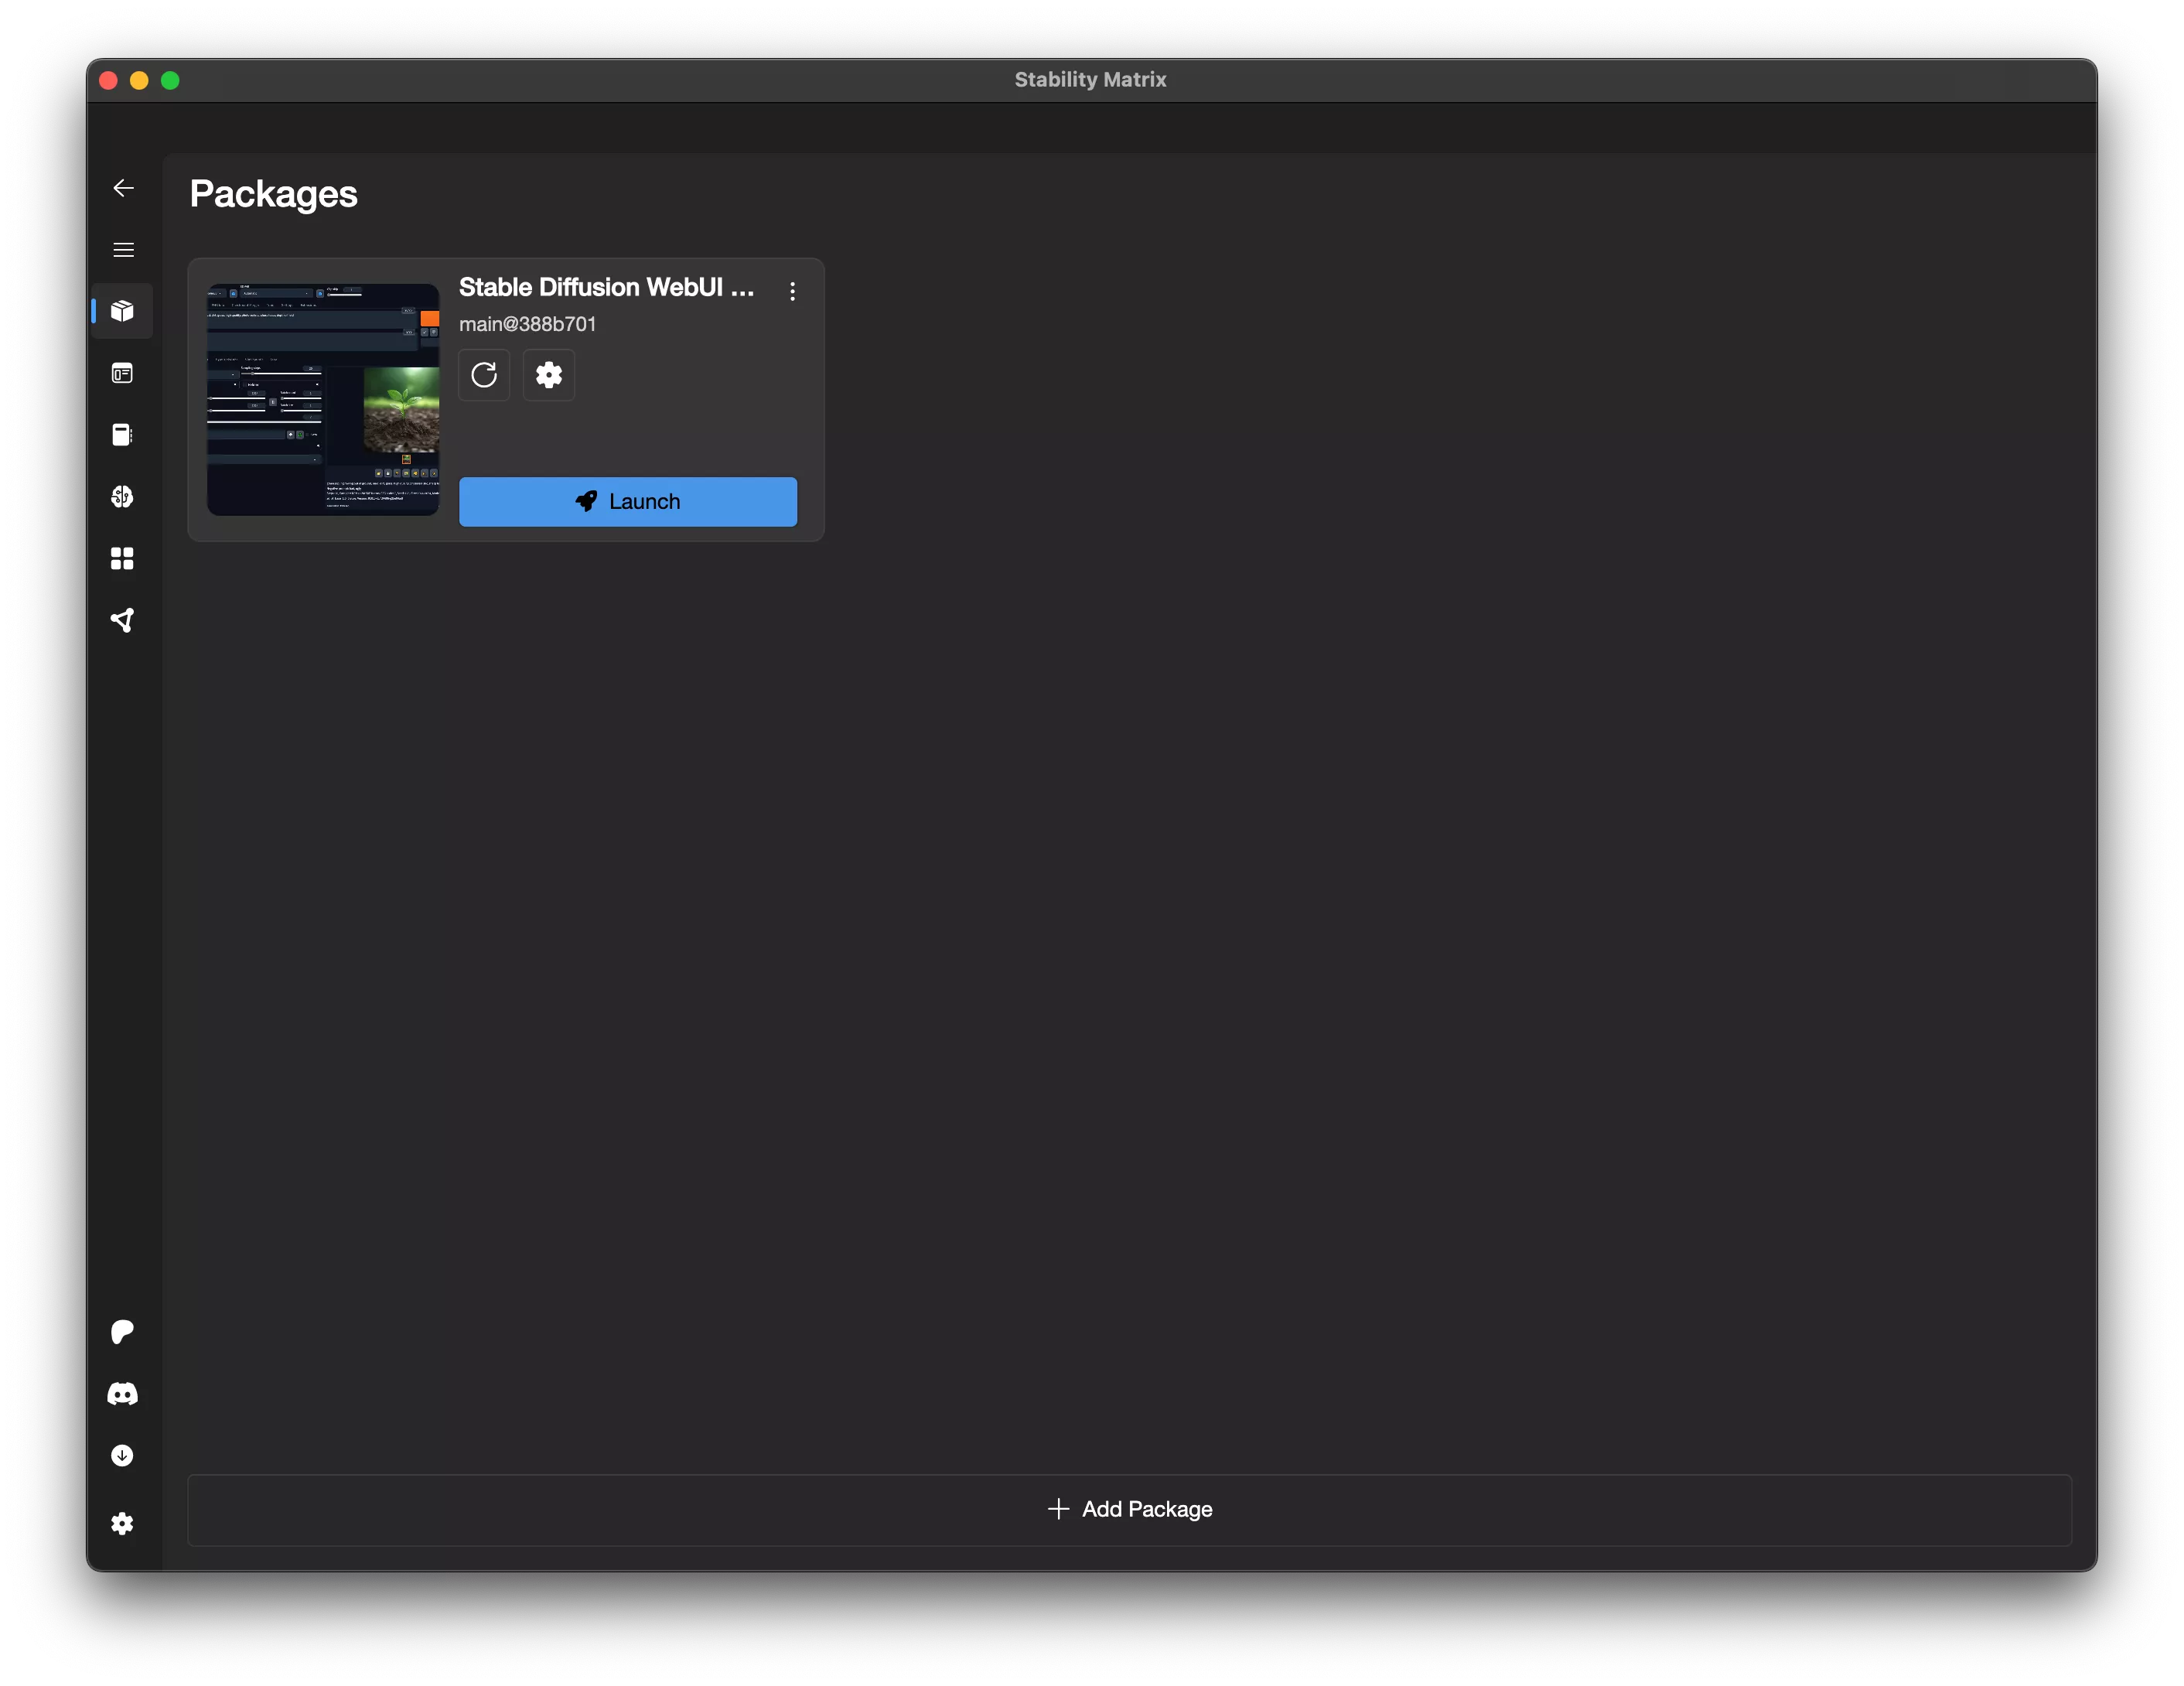
That's it, close StabilityMatrix for now, we'll start it up again later.
Installing Flux AI
For Flux, we'll need to add two files to the folder, data, but first we'll download them...
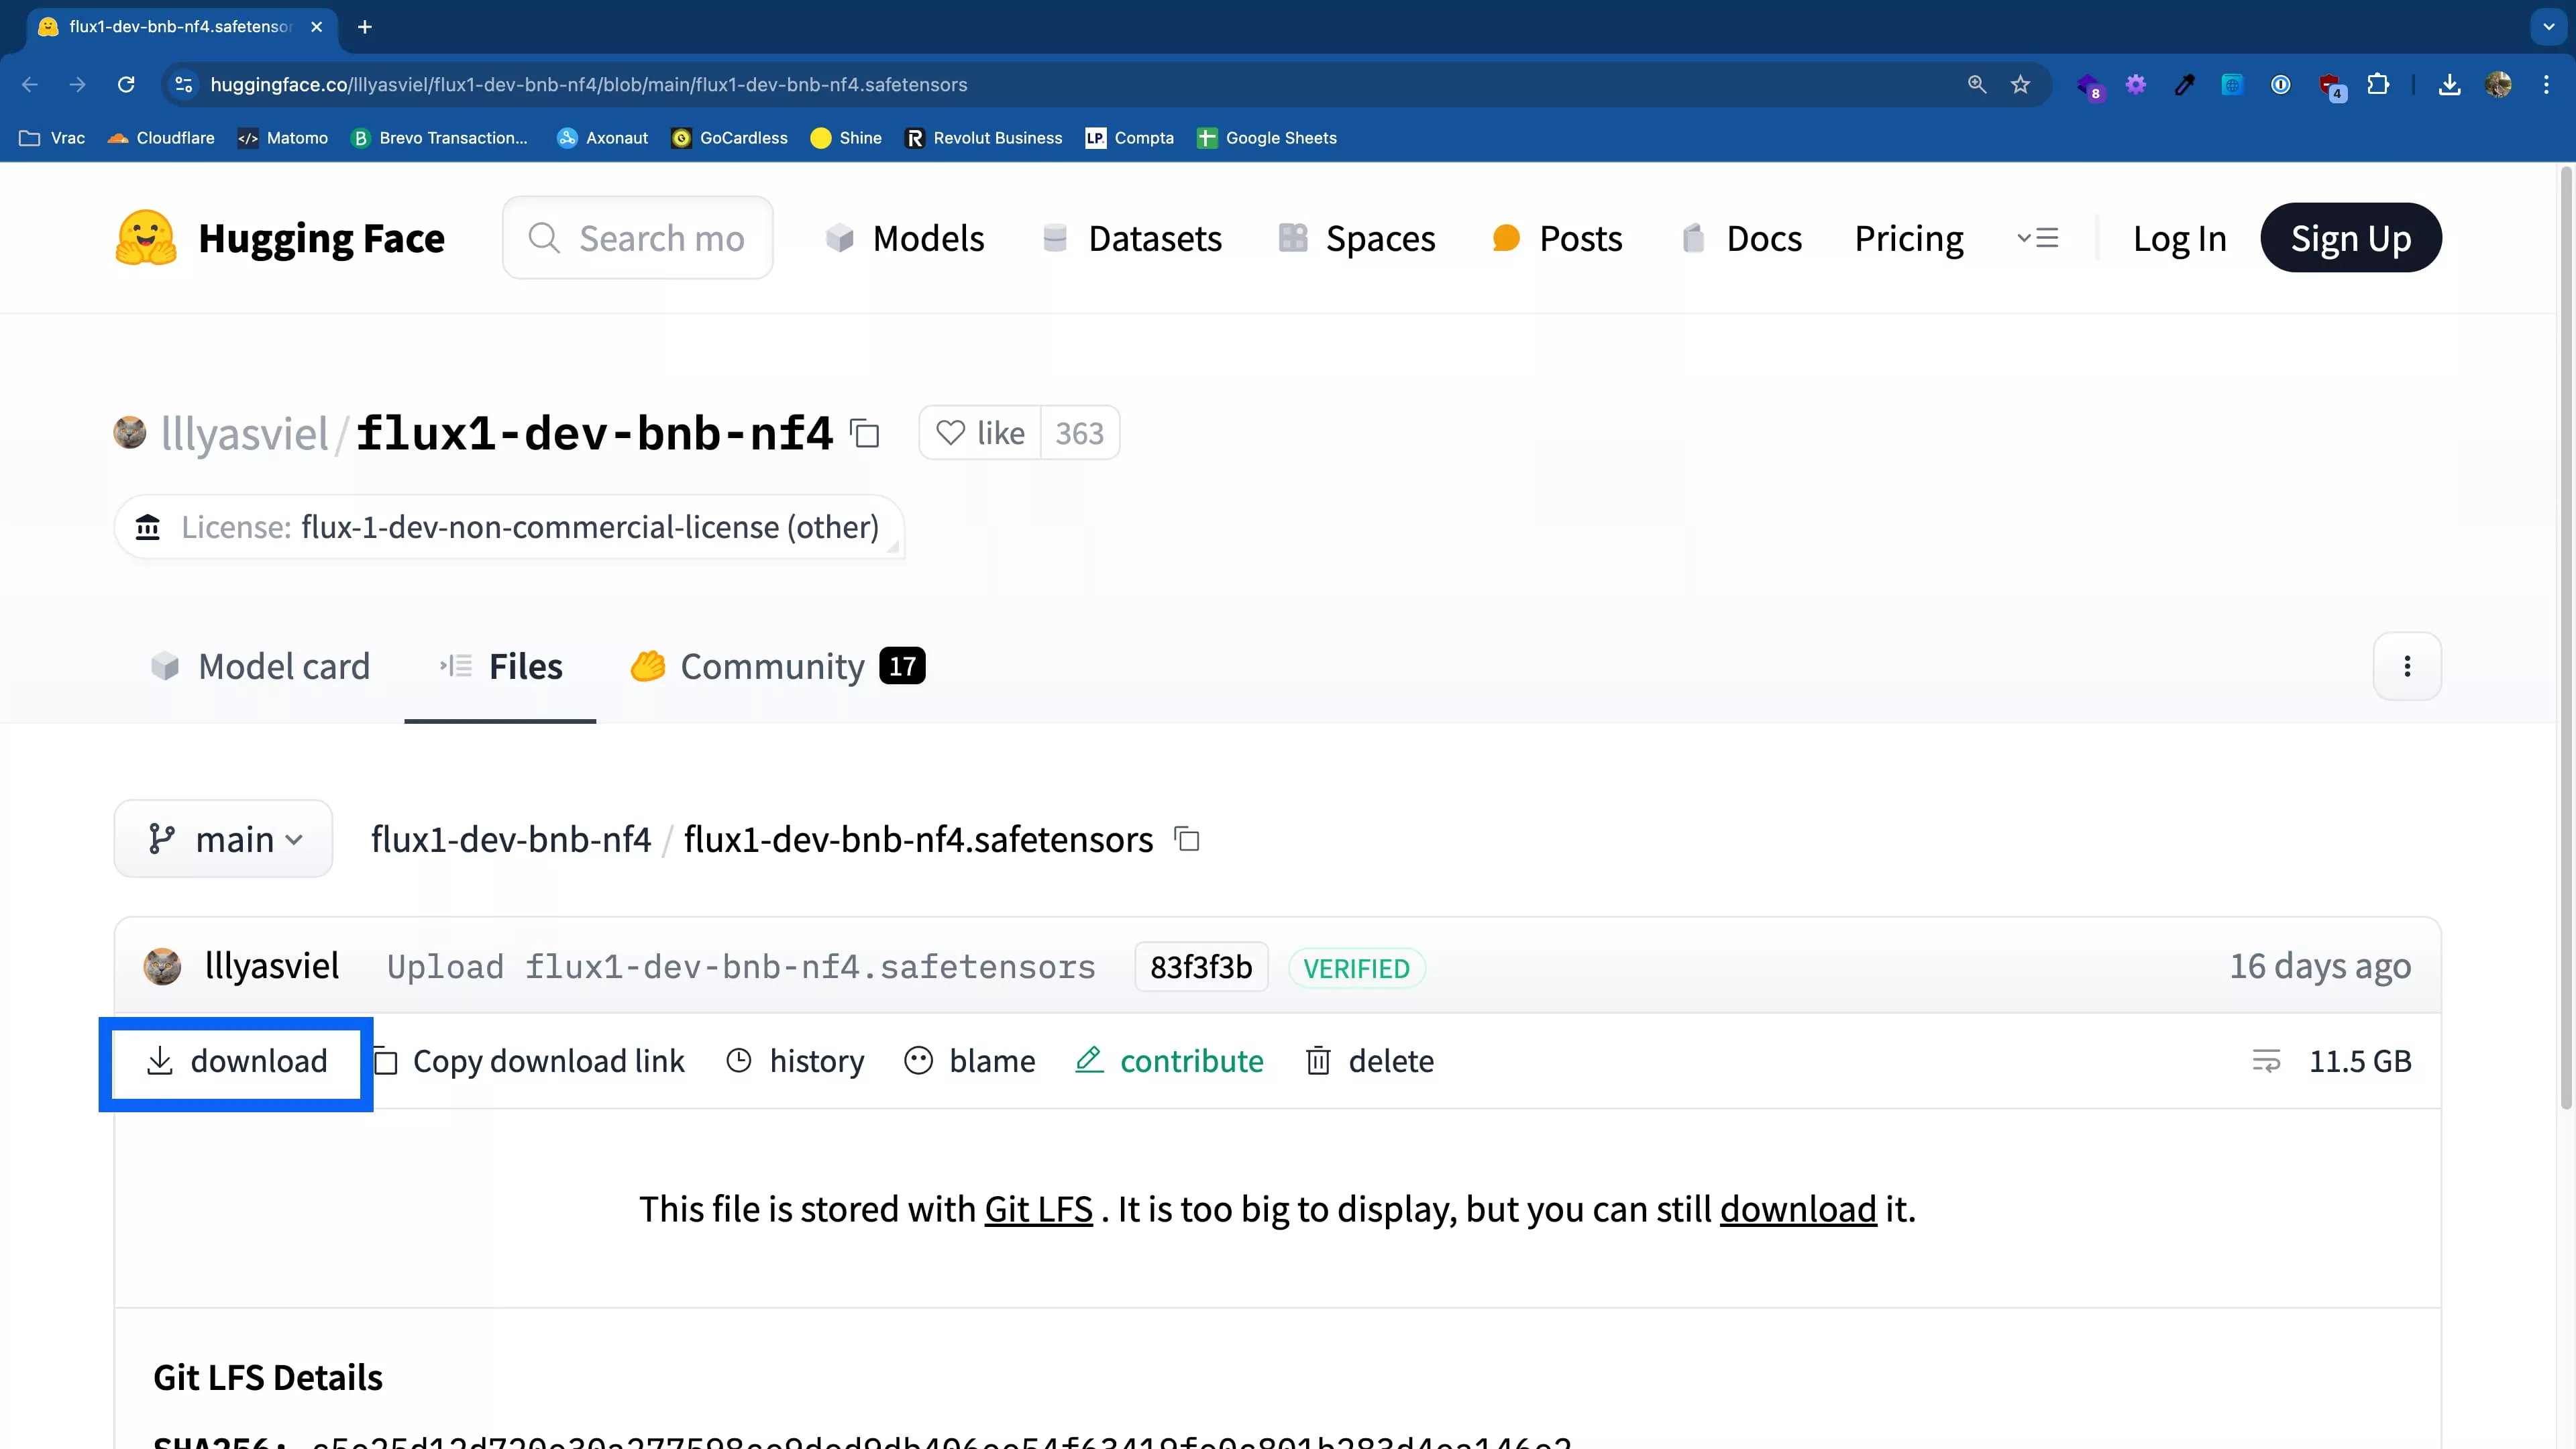
The first file ("flux1-dev-bnb-nf4.safetensors") is available here.
The second ("ae.safetensors") can be found in this repository
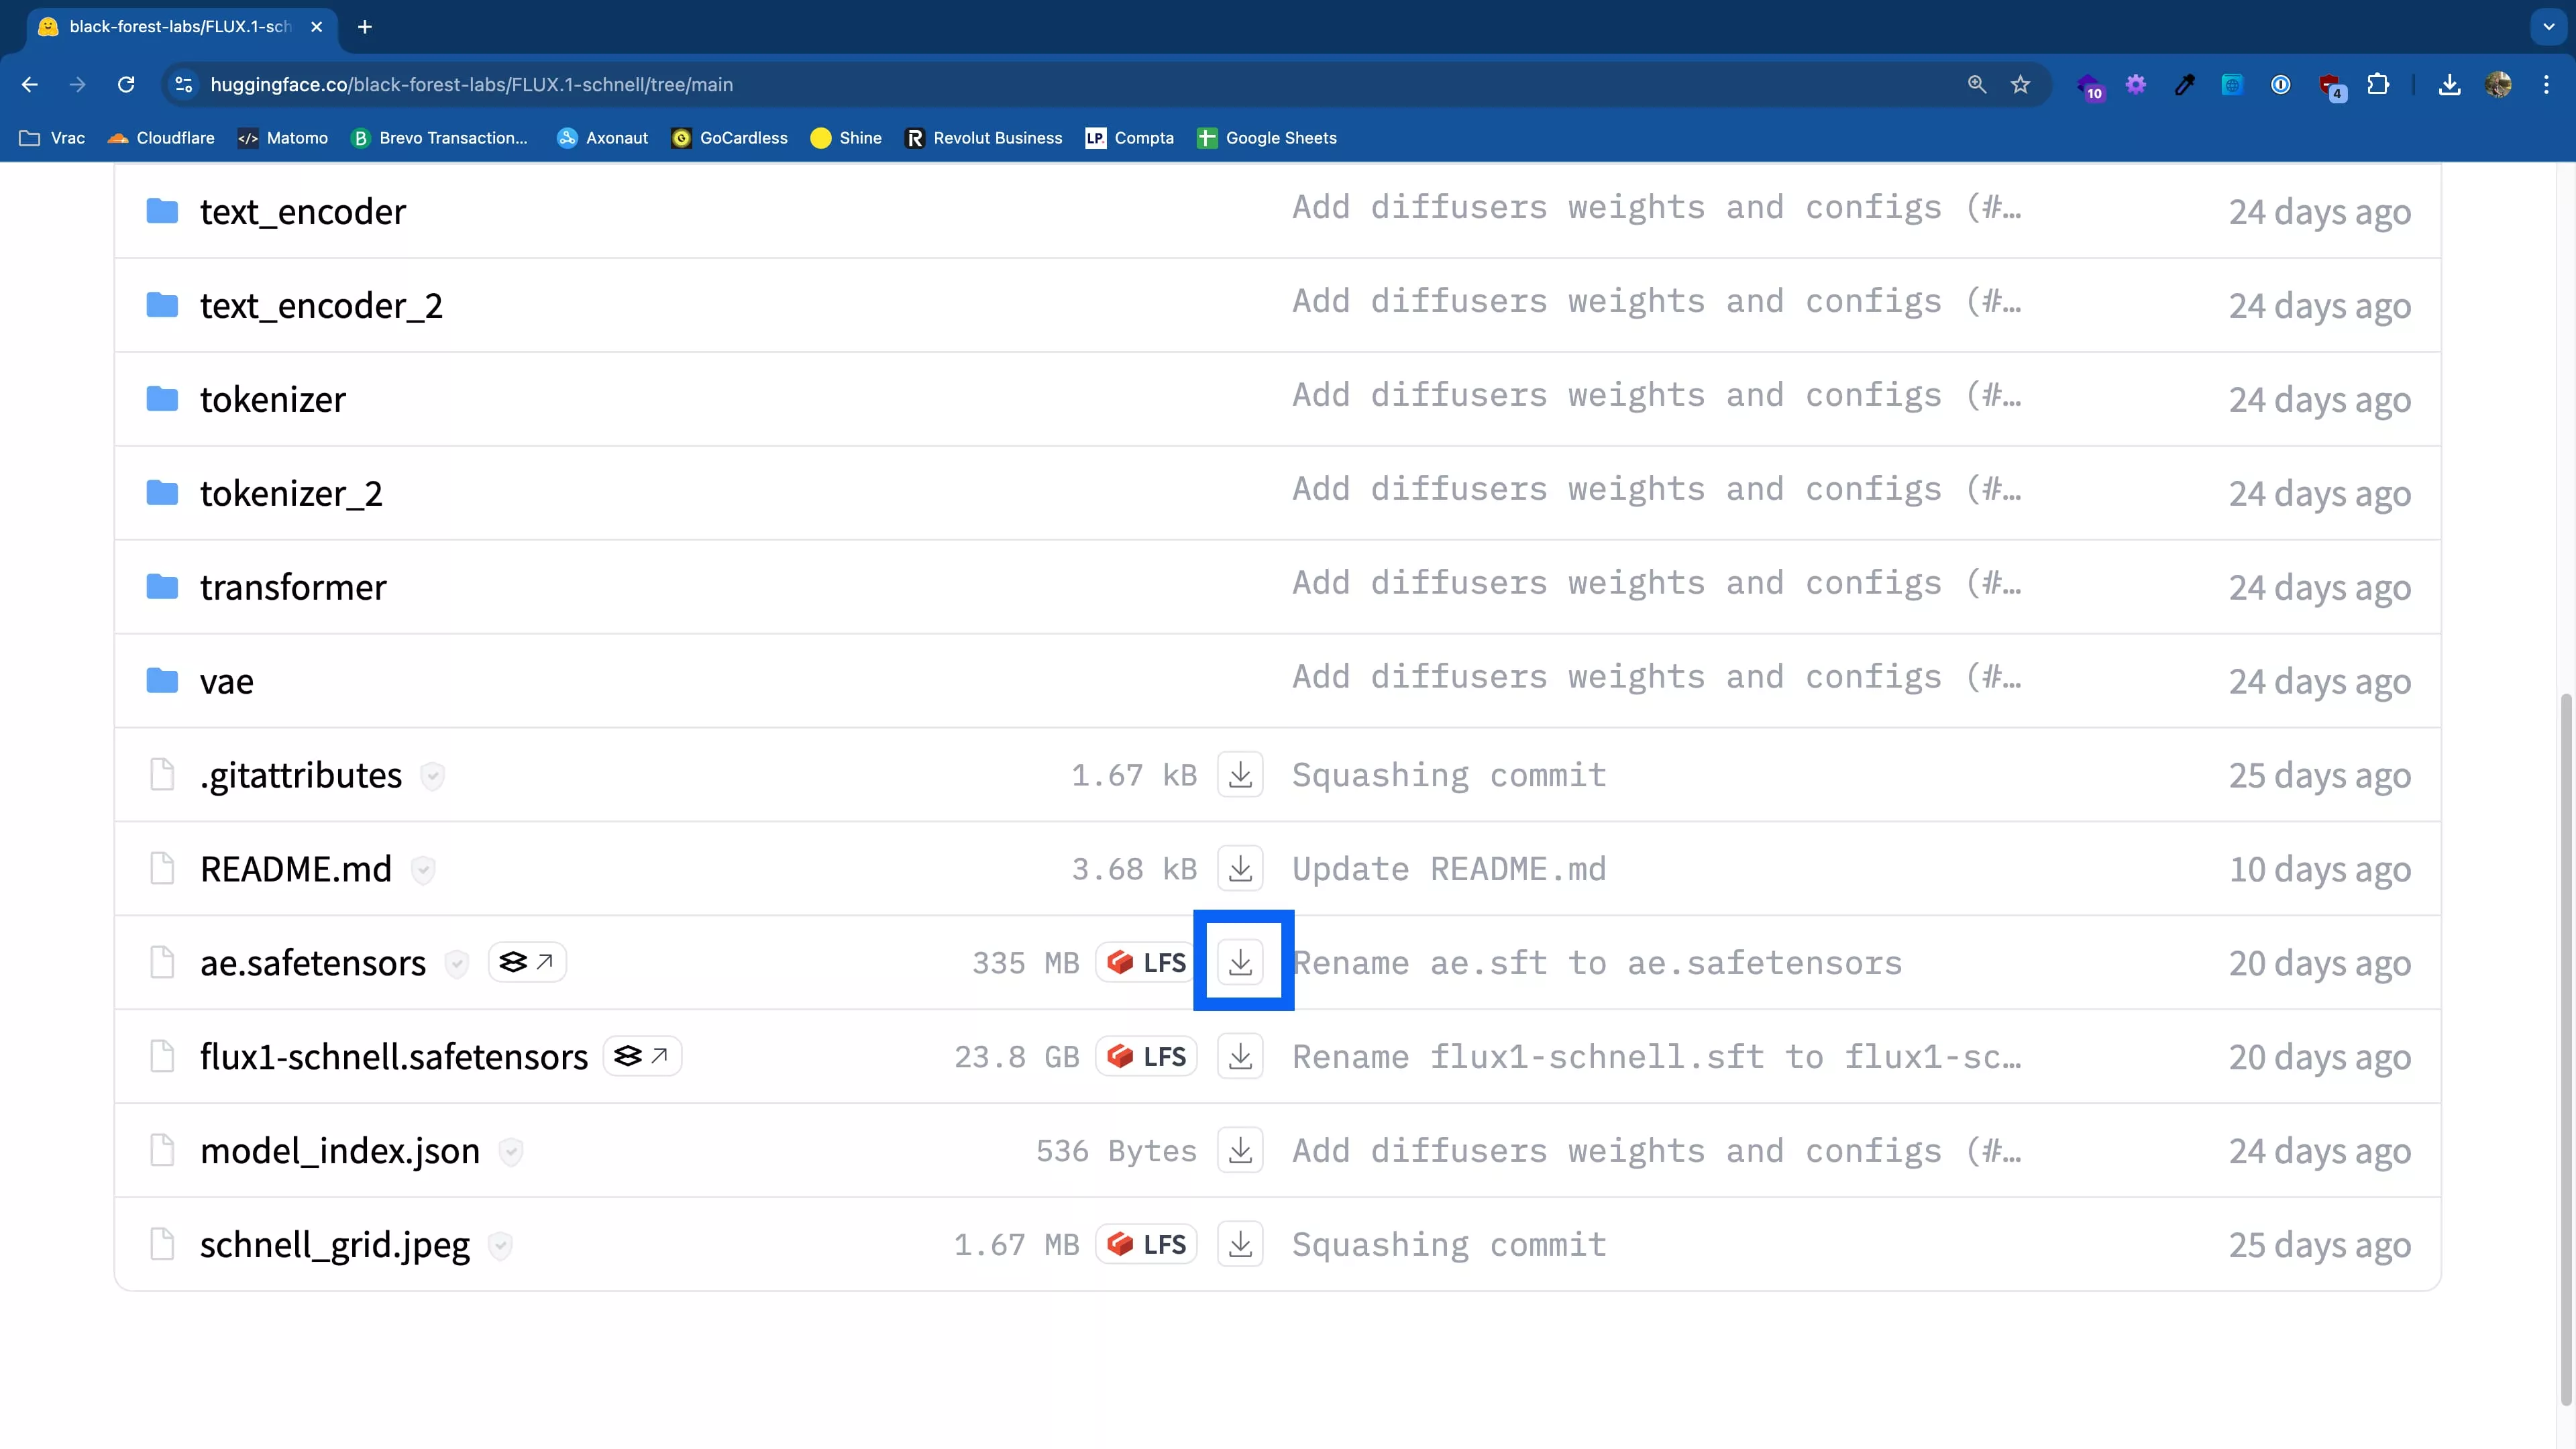
Once the download is complete, you'll need to place the files in the right places.
Go to the "Data" folder, then "Models", of your StabilityMatrix installation.
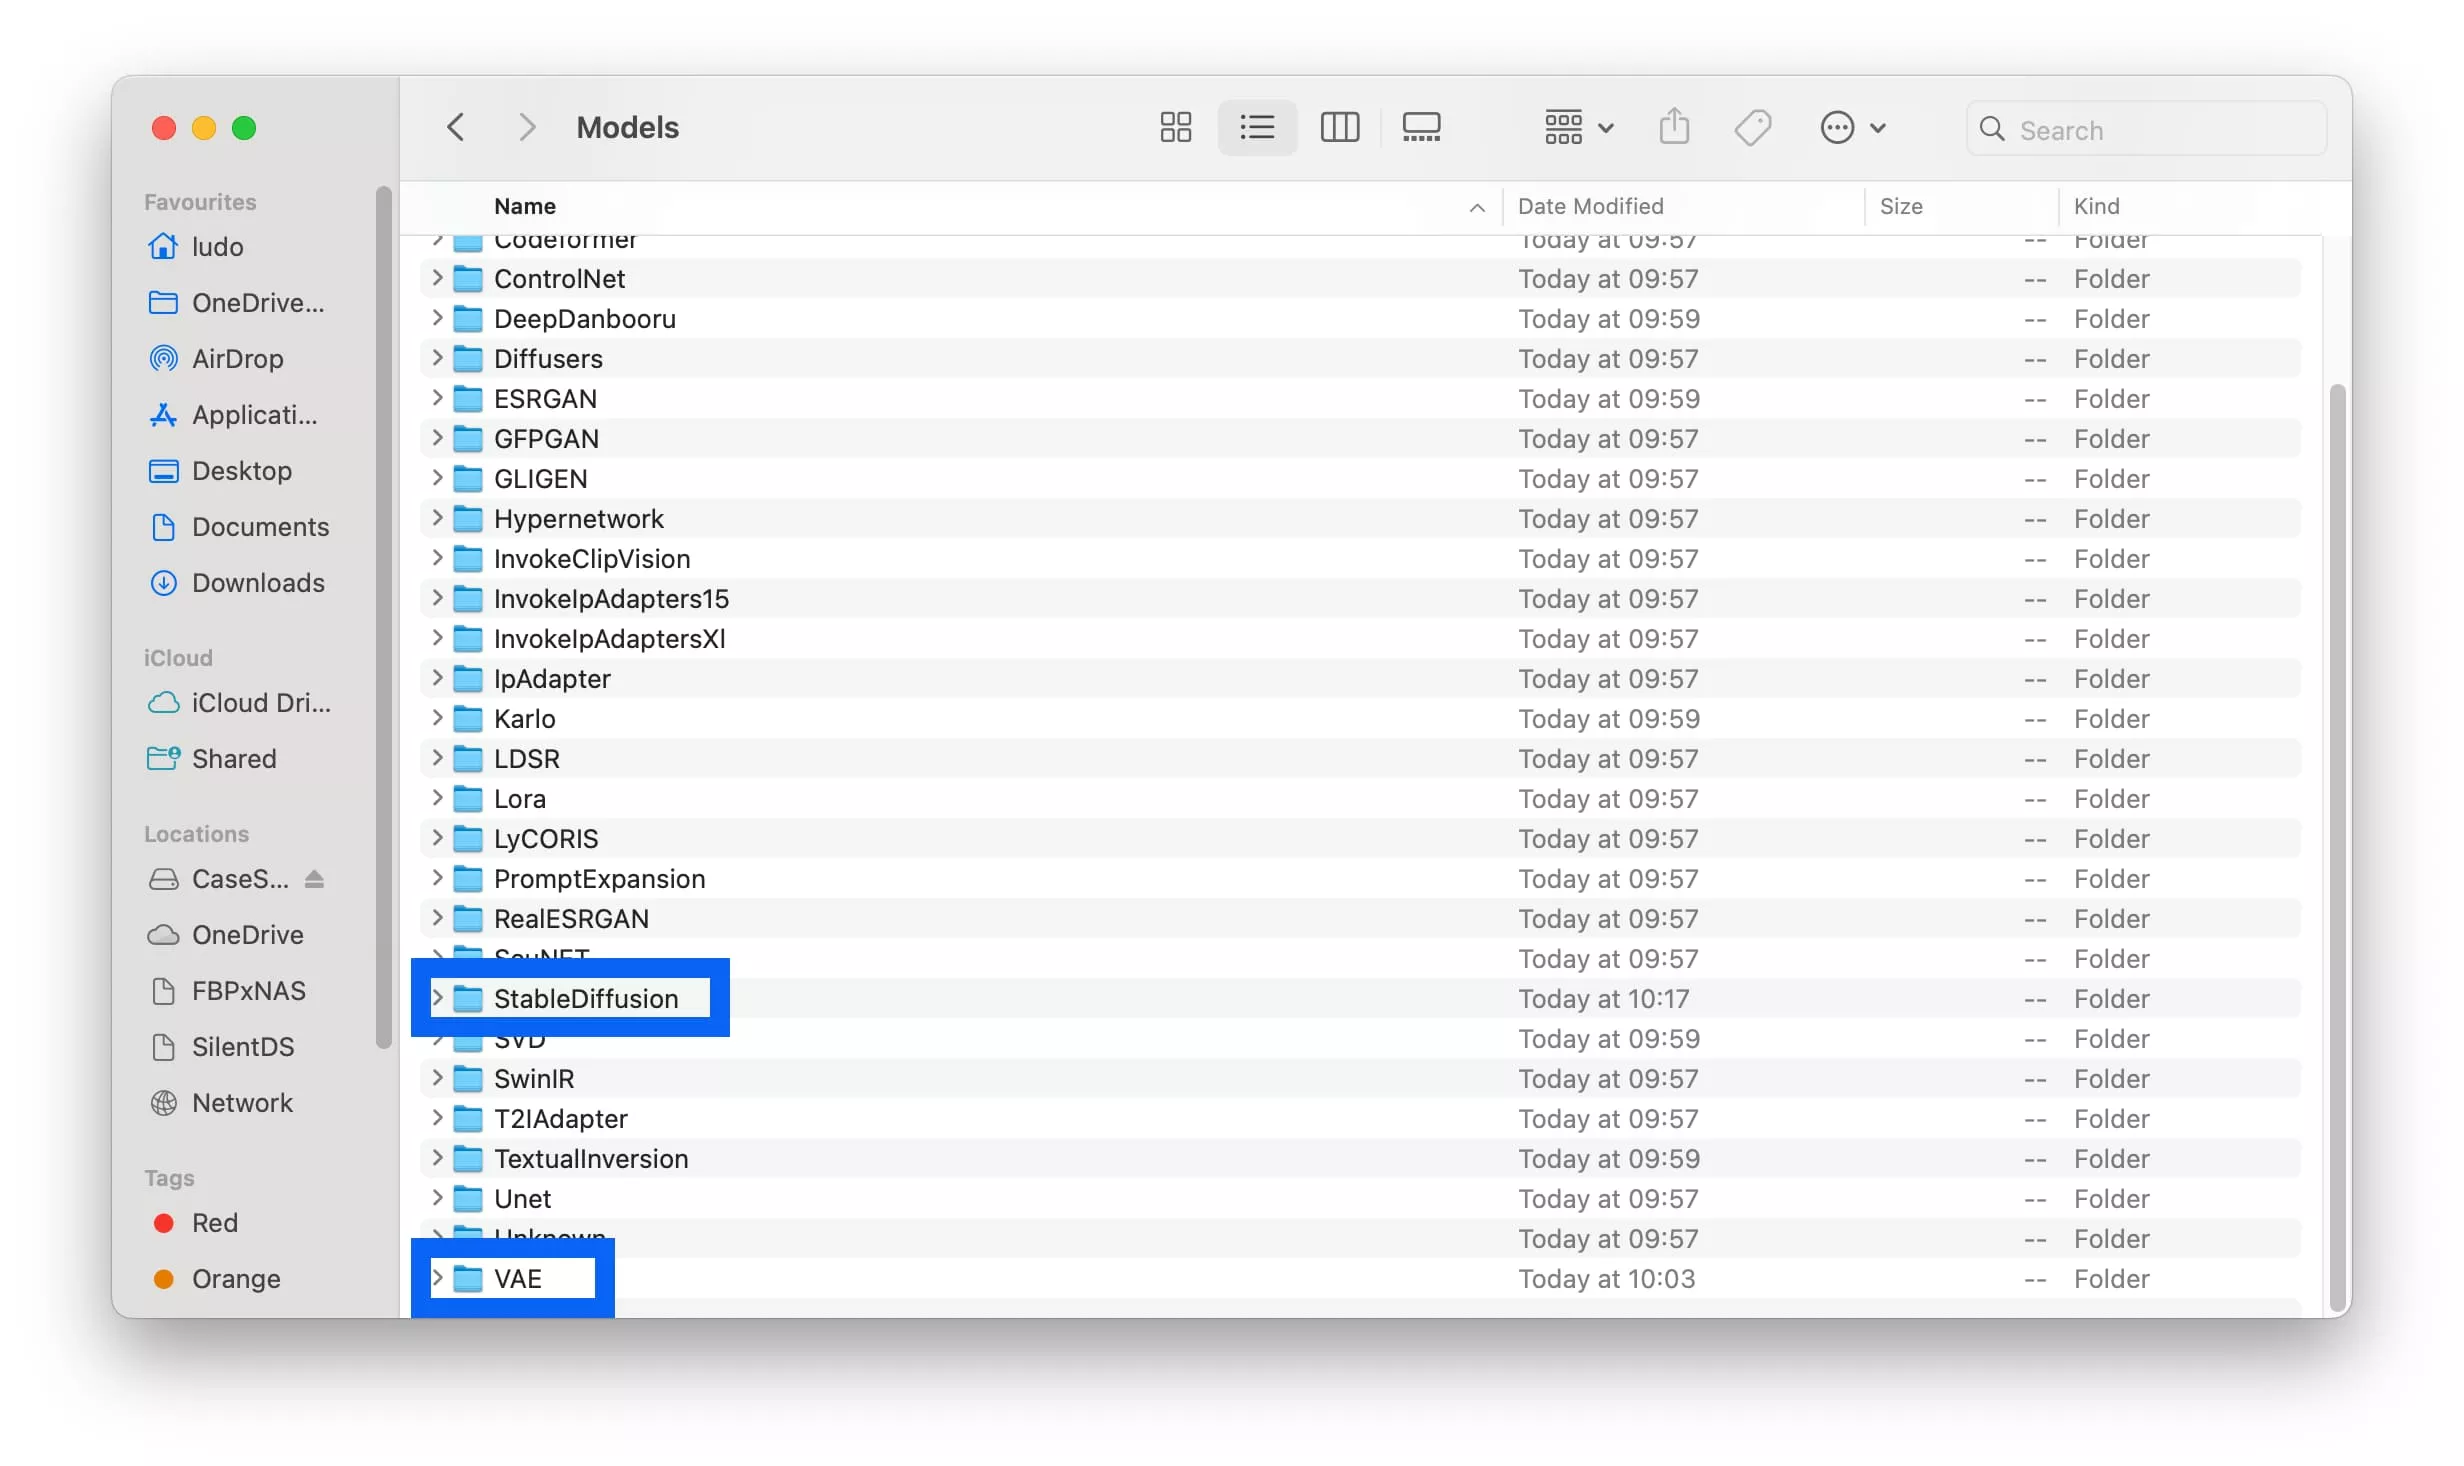
The folders we'll be using are "StableDiffusion" and "VAE".
In the StableDiffusion folder, create the "Flux" folder.
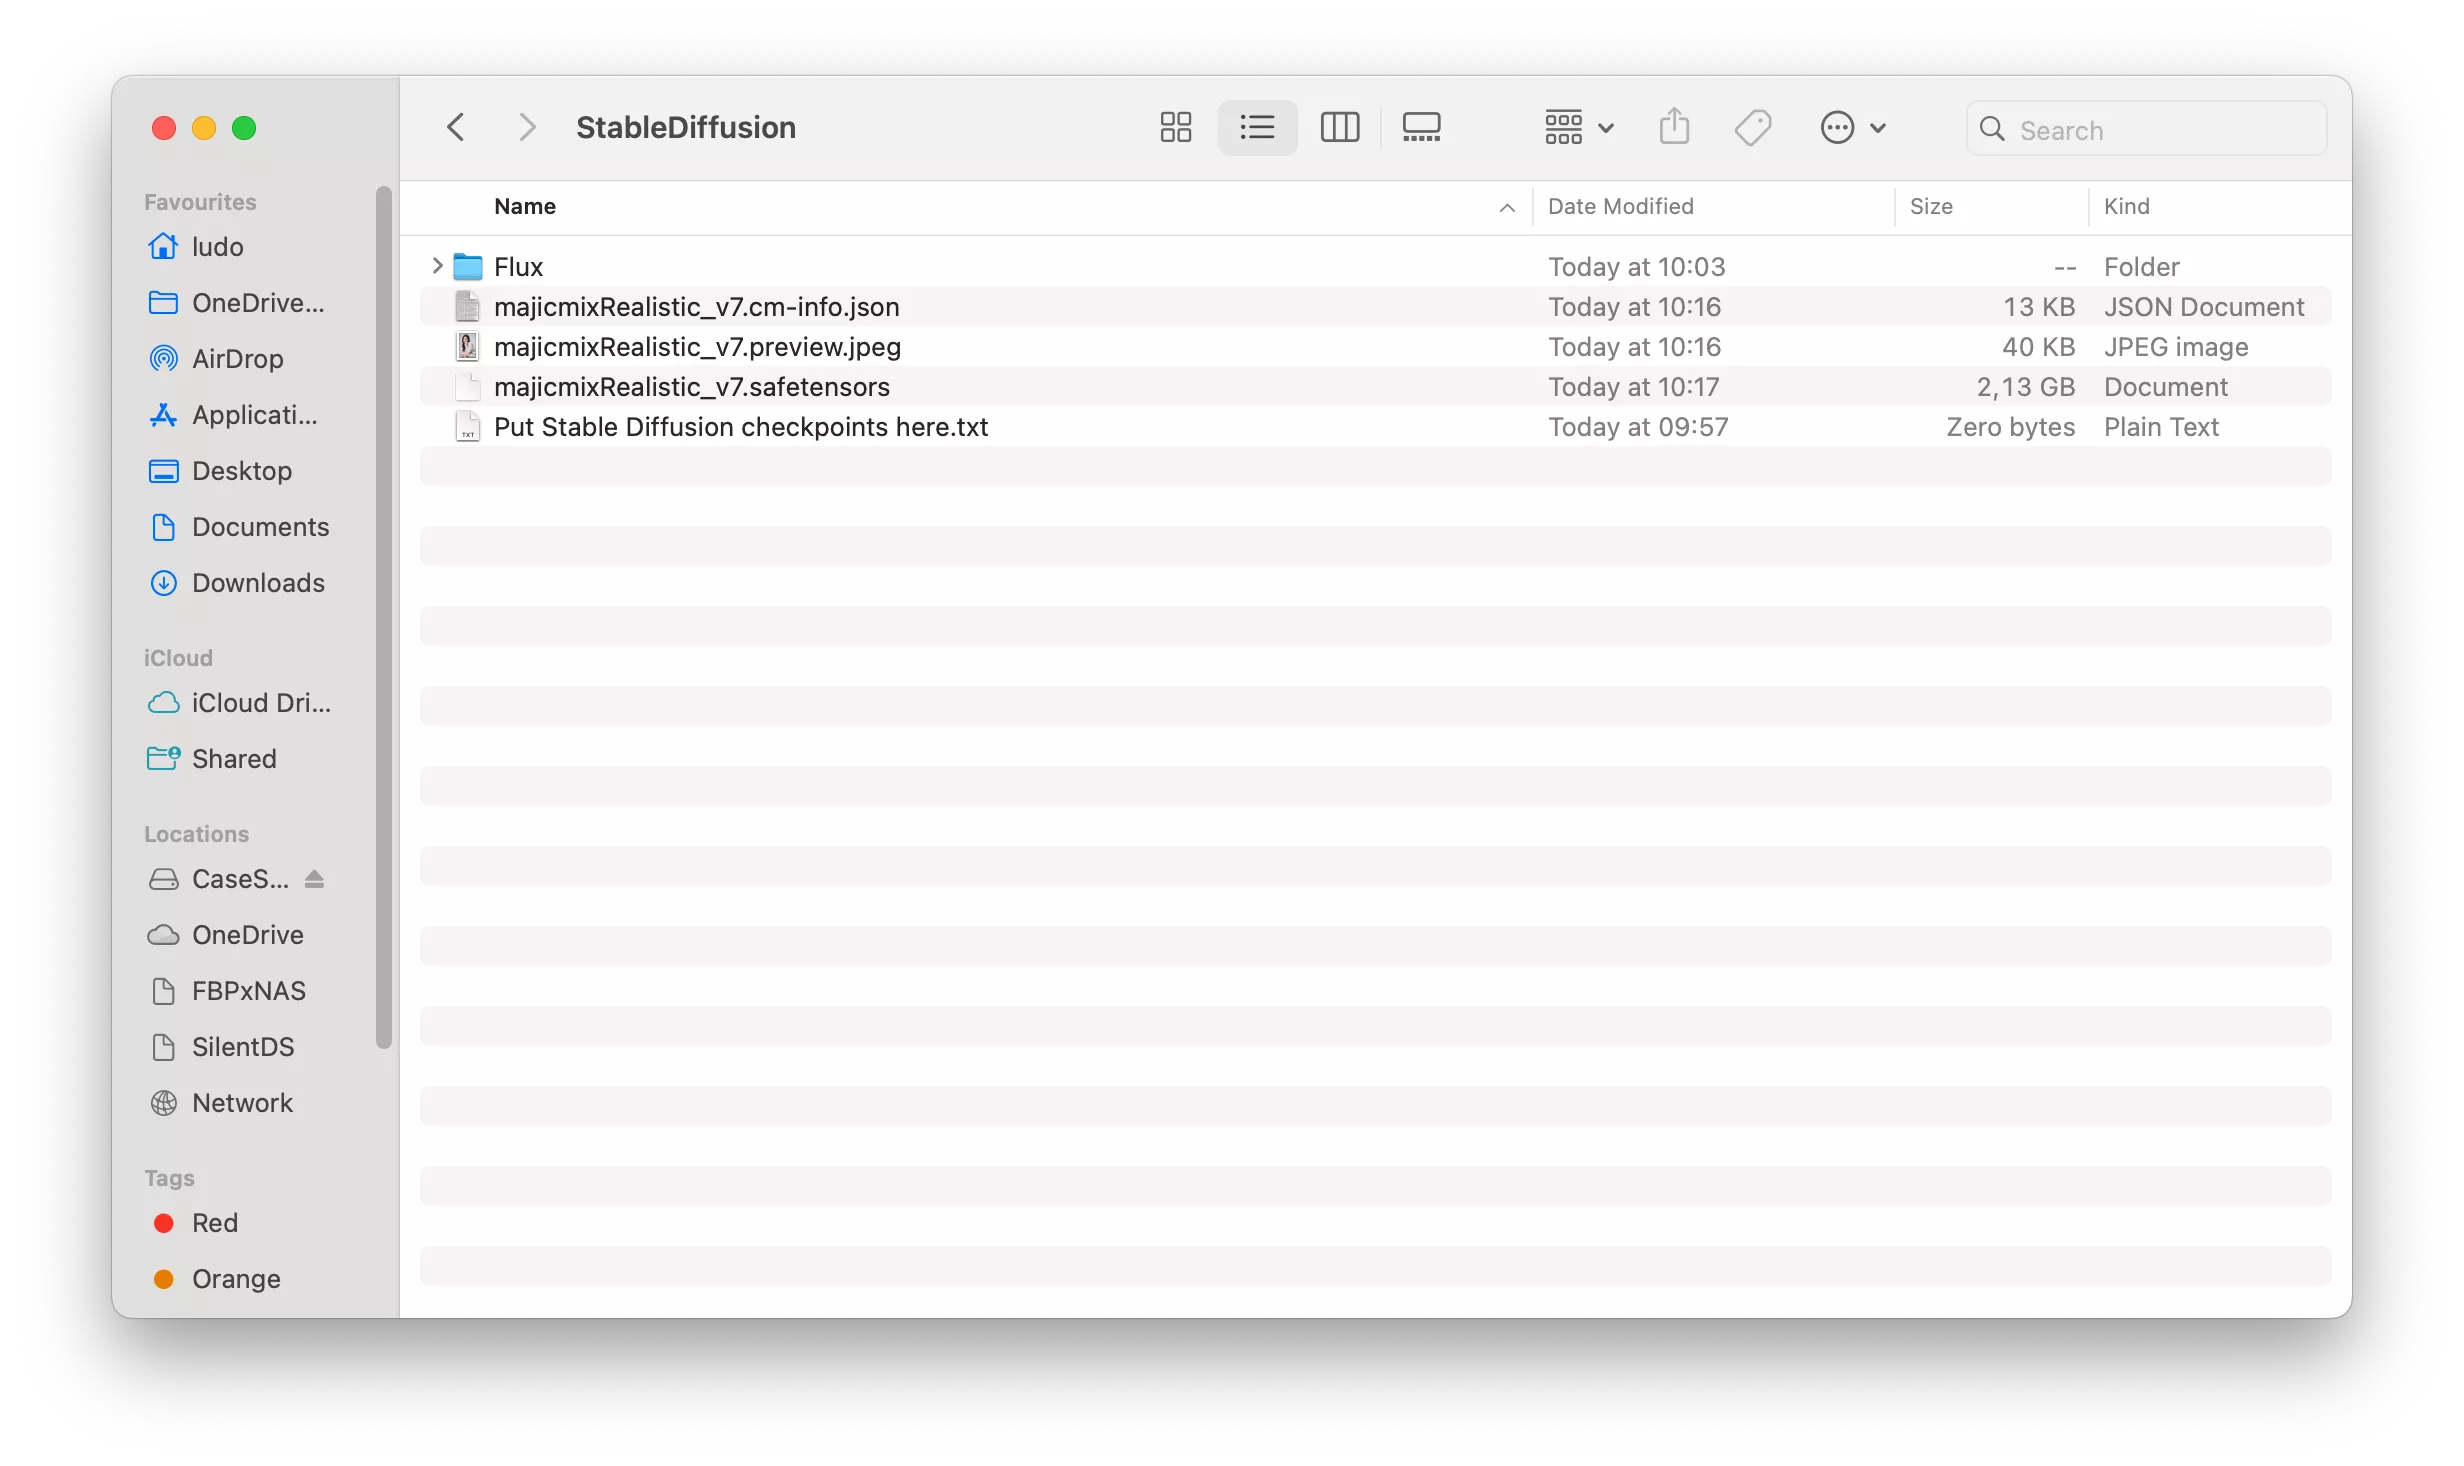
(Yes, on my screenshot, there are extra templates, but don't worry, that was just for testing purposes, you don't need them).
Once in the "Flux" subfolder, place the "flux1-dev-bnb-nf4.safetensors" file there.
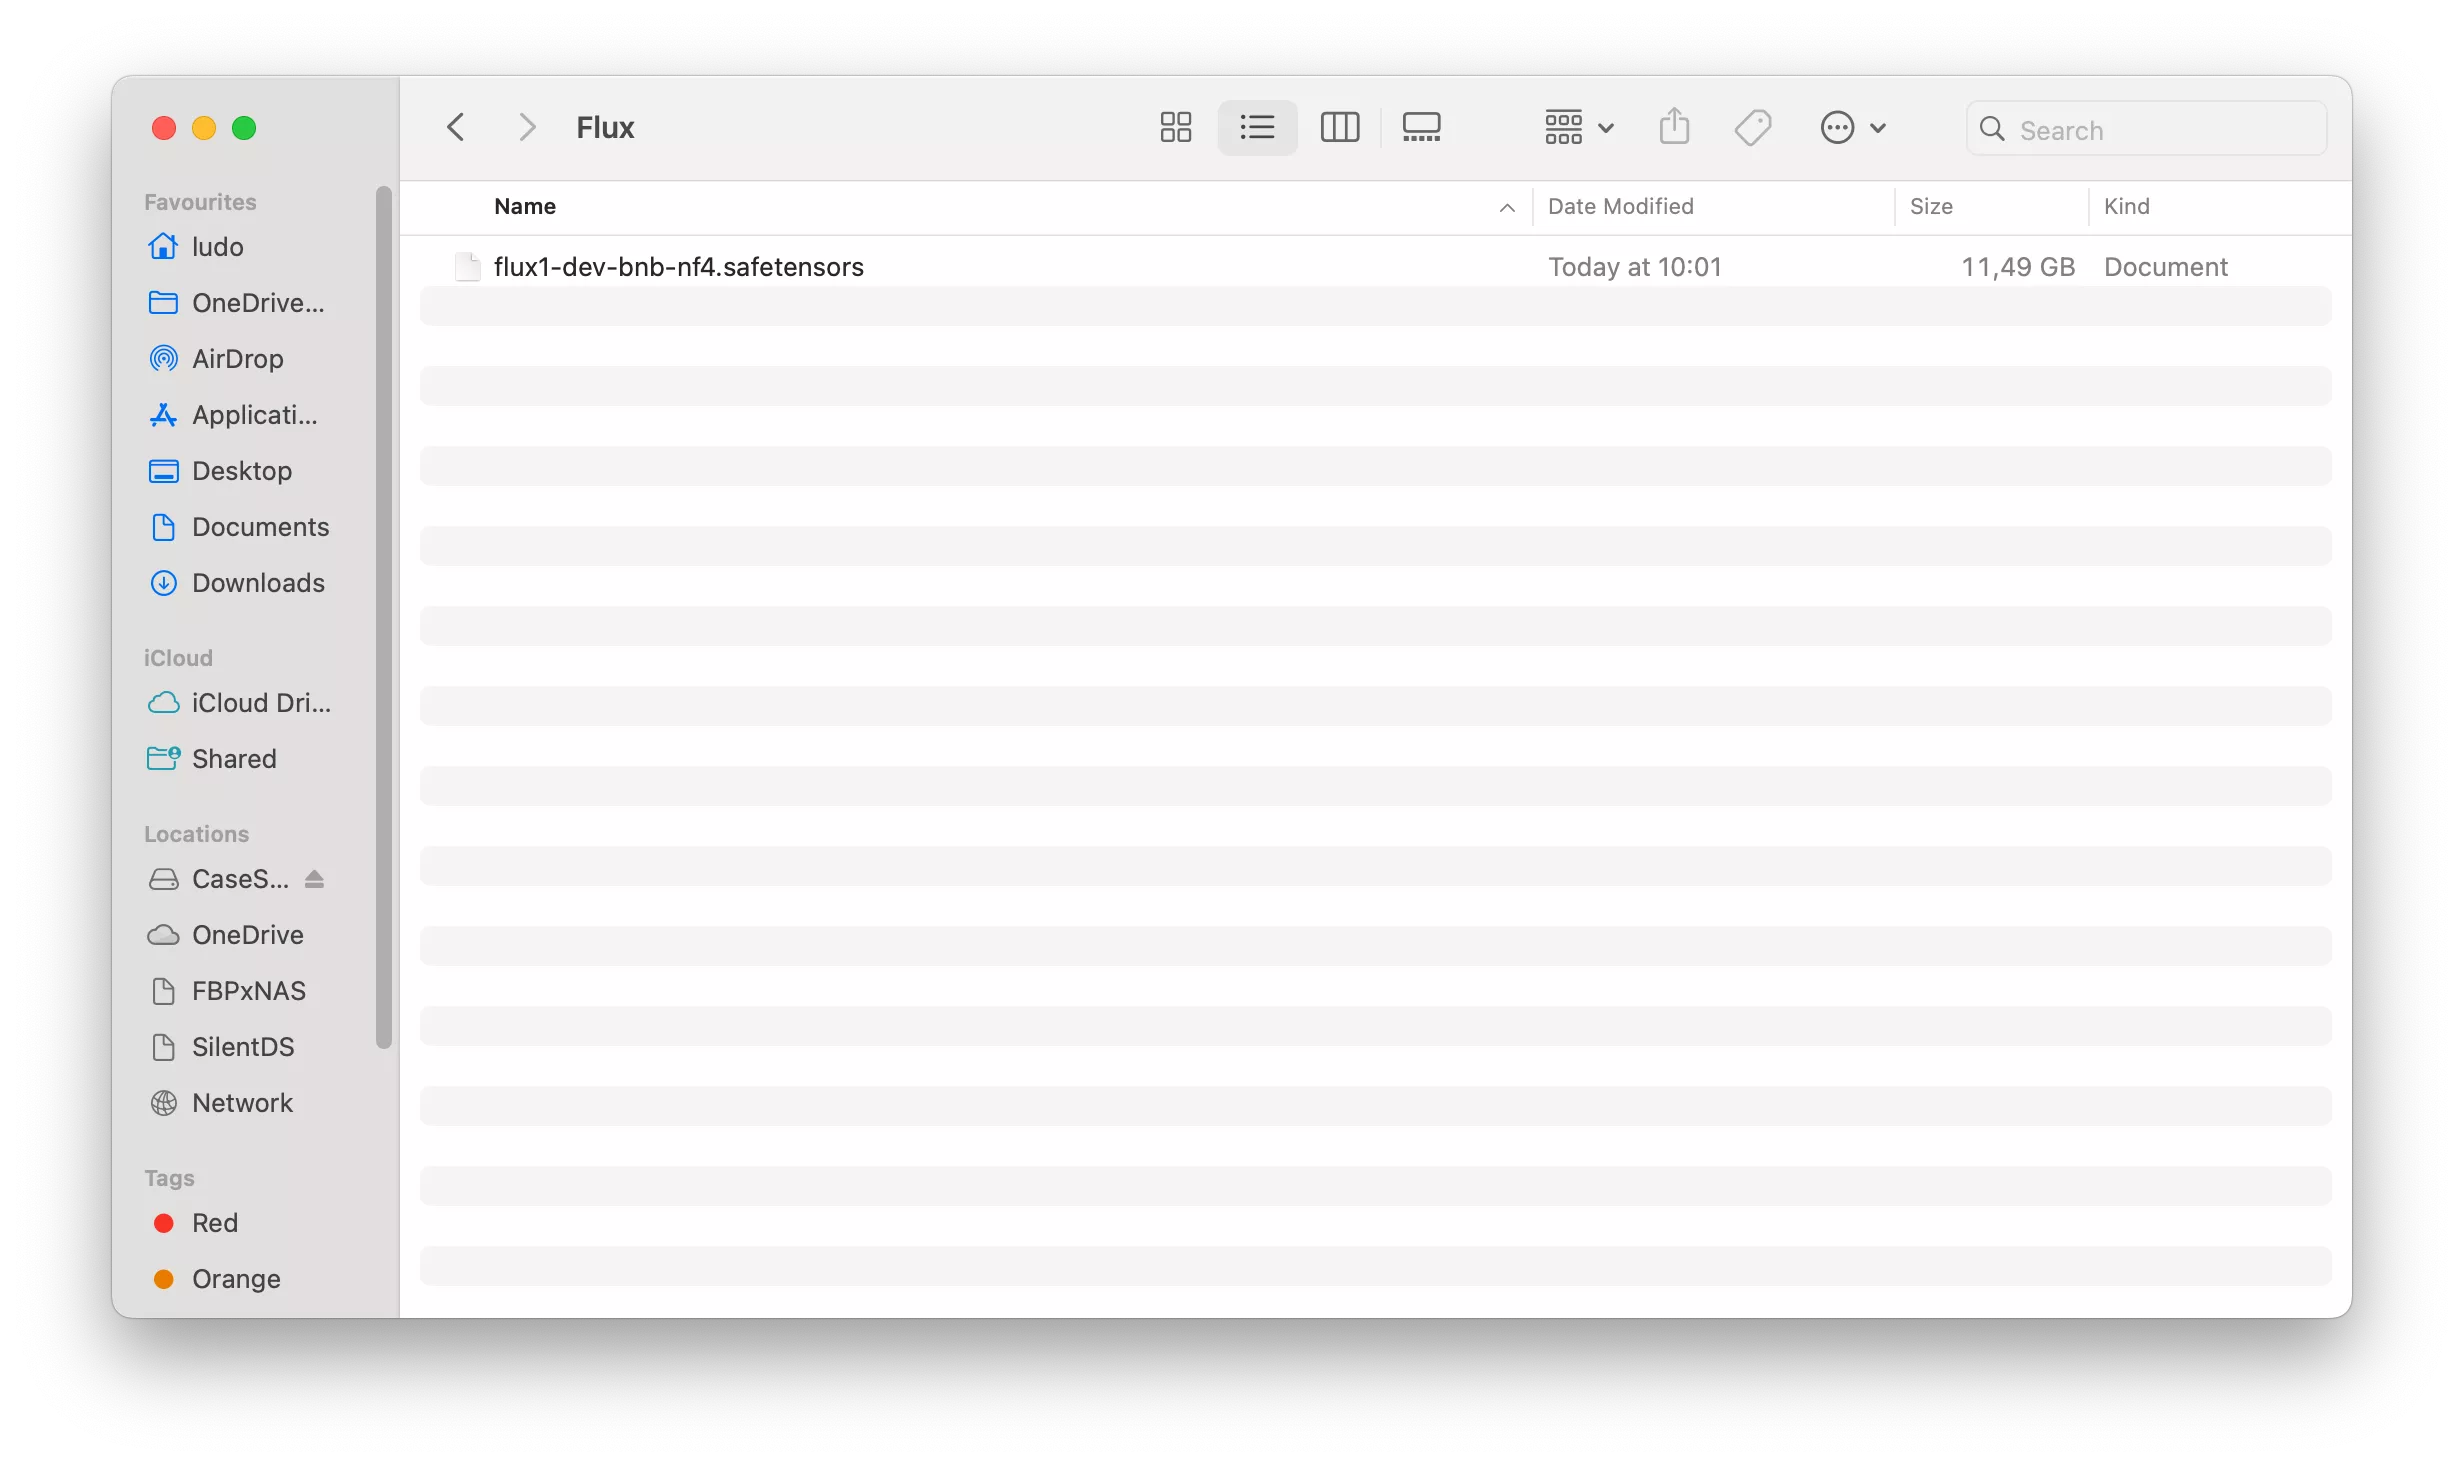
Perfect, yes,, it's almost 12 go 😮.
Now, go back to your parent "Models" folder and go to the "VAE" folder, then place the "ae.safetensors" file there.

Flux is now installed on your StabilityMatrix installation.
Launching the Web UI with Flux
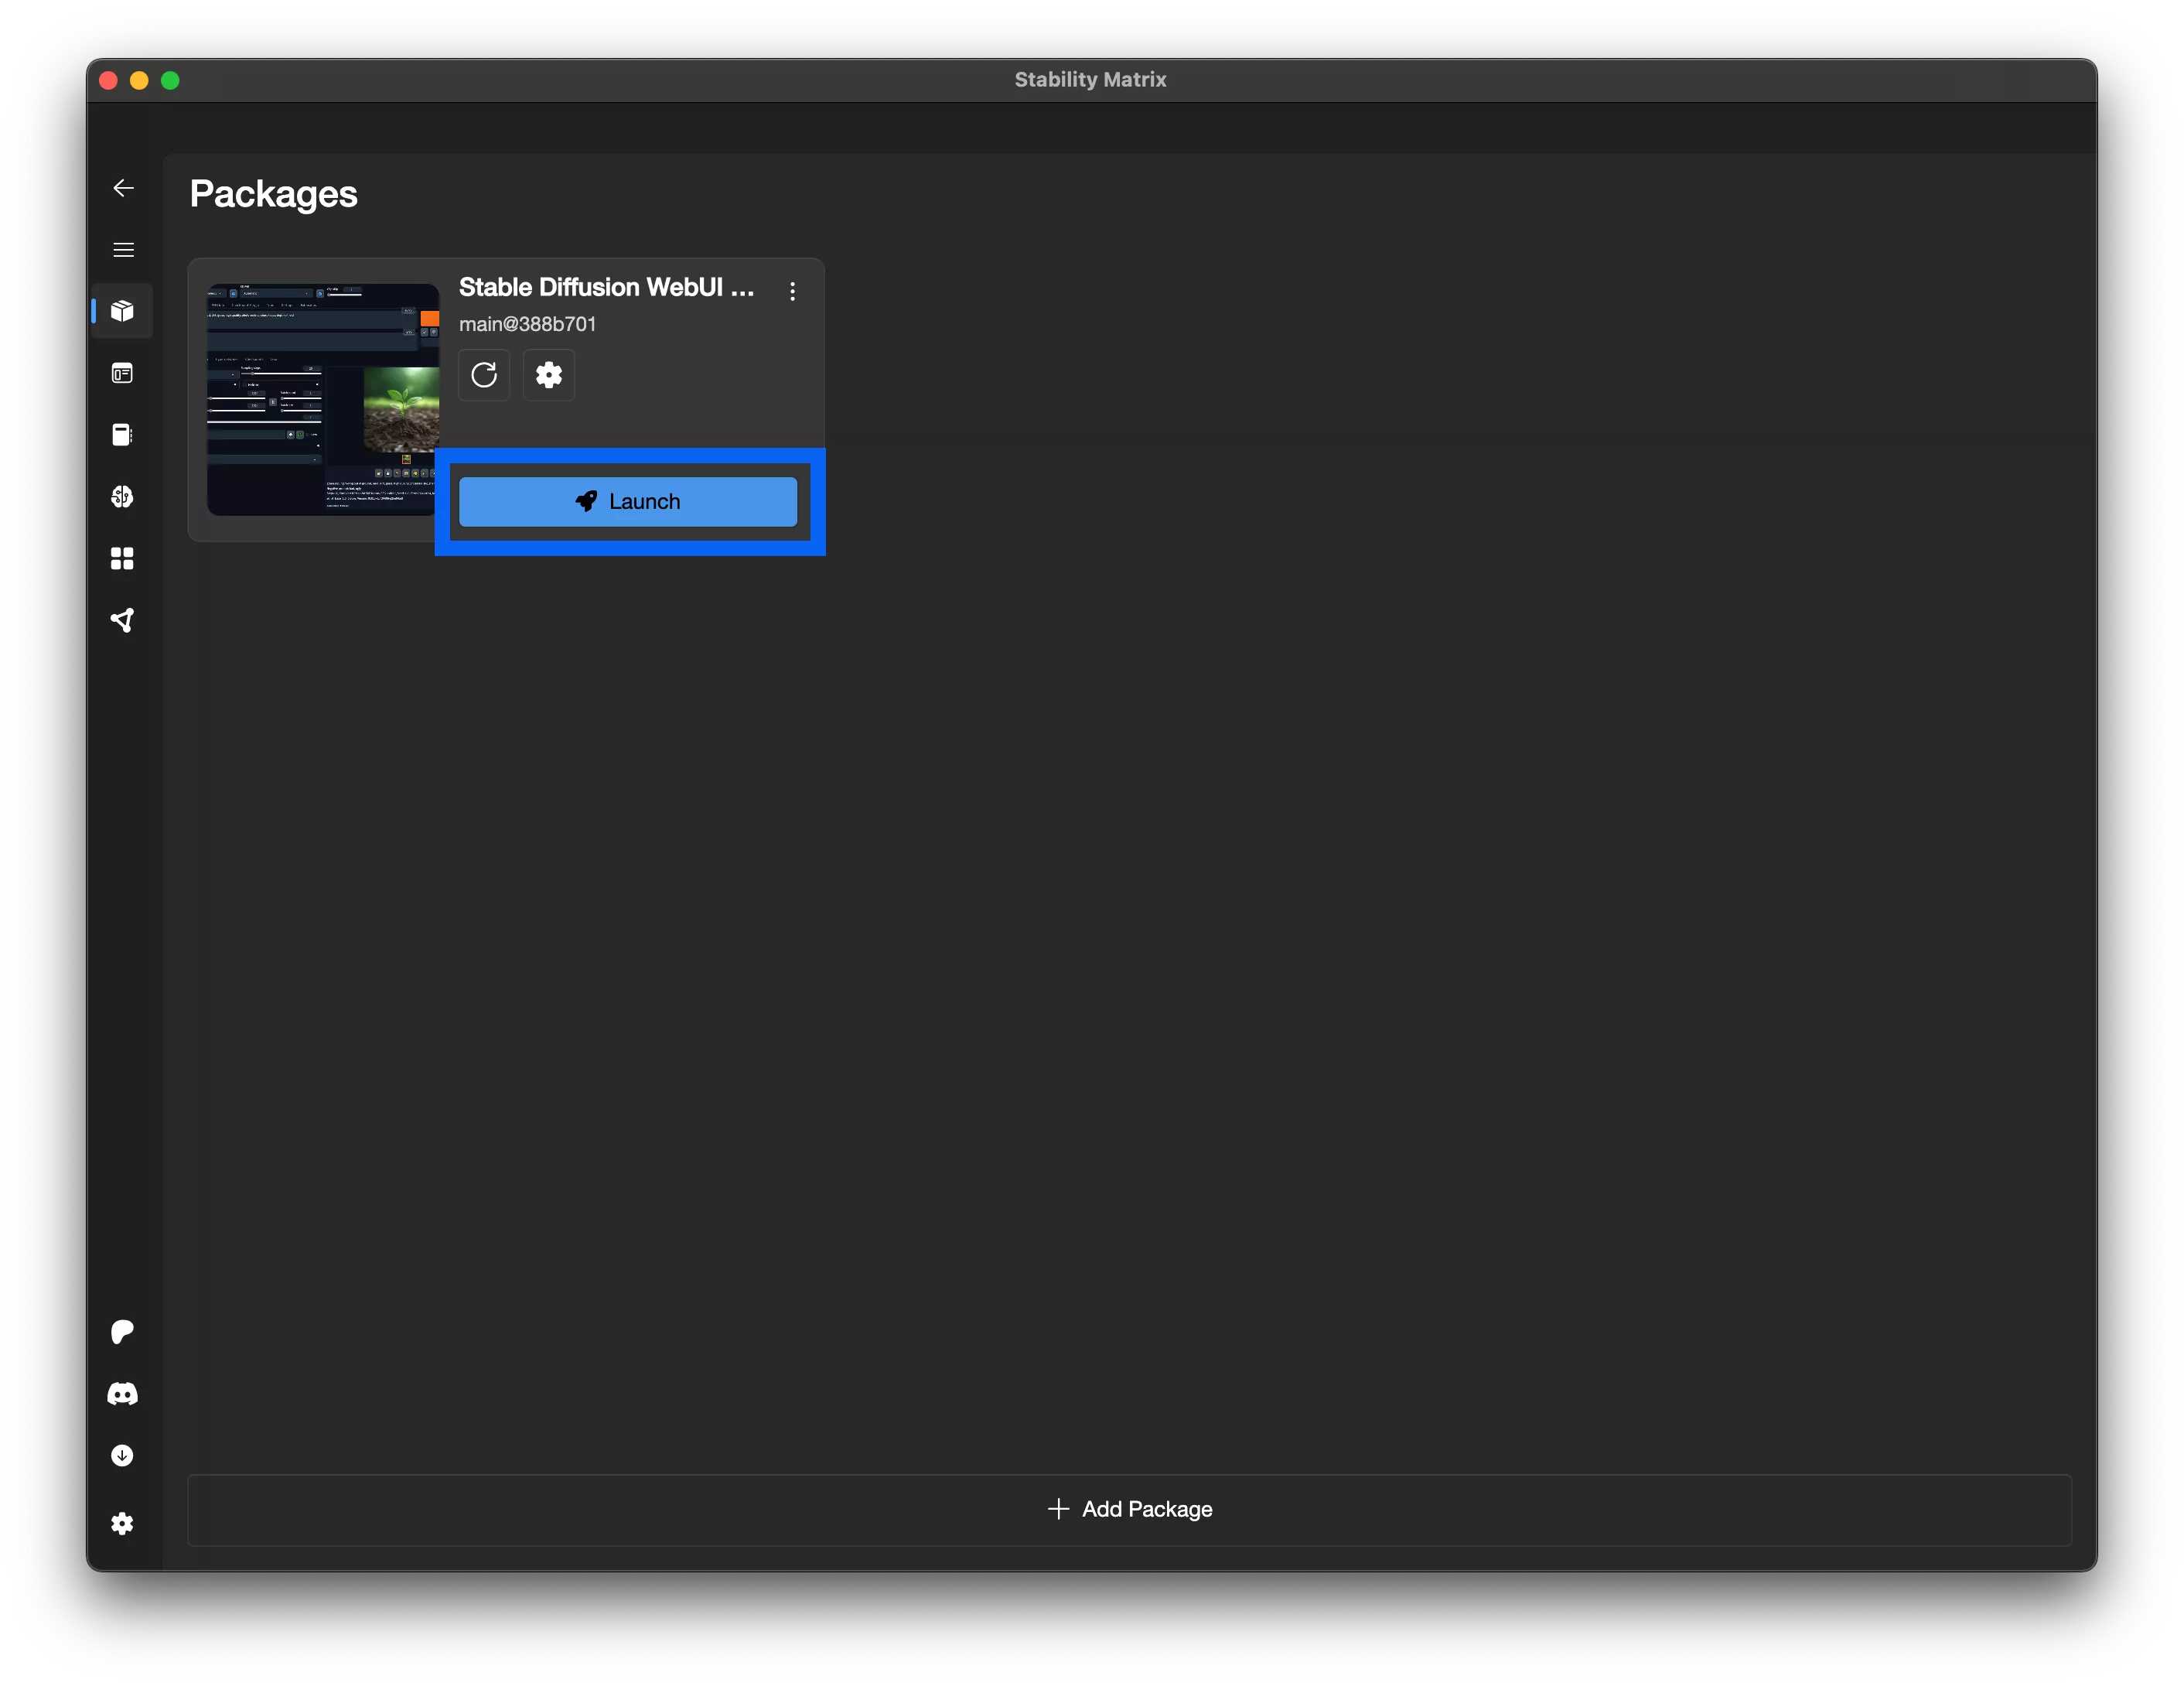
You can now relaunch StabilityMatrix, and click on "Launch" under "Stable Diffusion Web UI Forge".
Once everything is loaded (it takes a while the first time), you can click on "Launch Web UI".
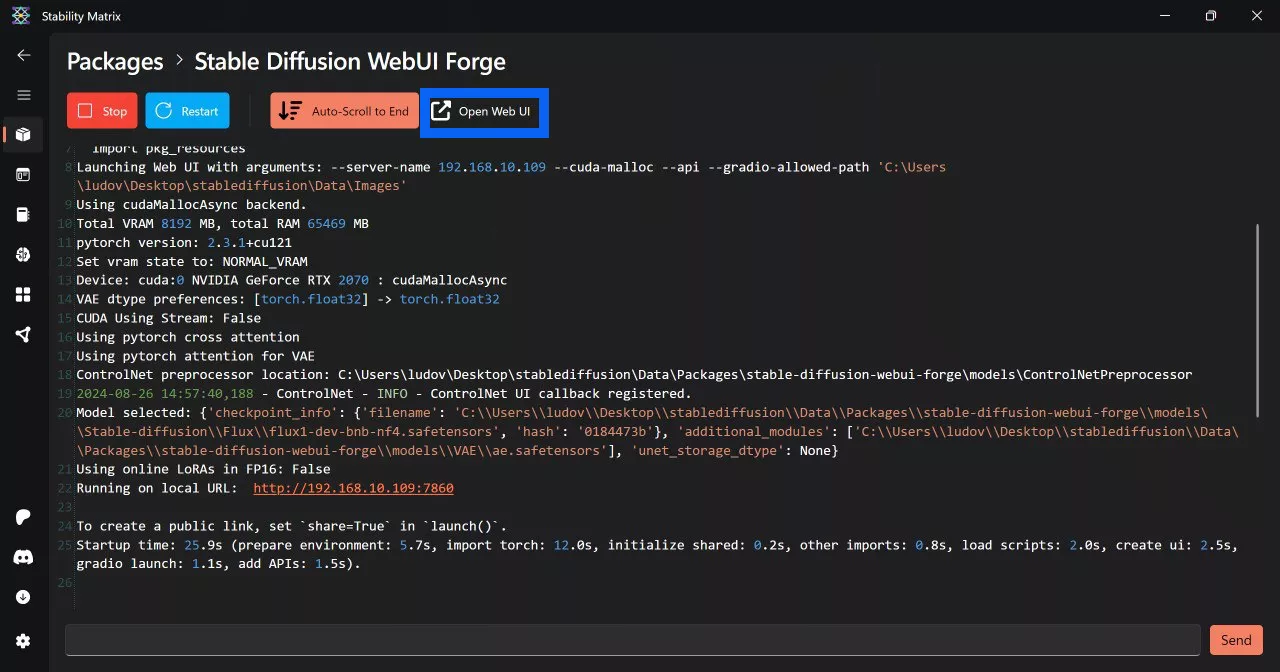
(Yes, no, but yes, this capture is under Windows, because I had forgotten to do it before, sorry... 😛)
Once you're in the Web UI, check that you have the same settings as me on in the interface.
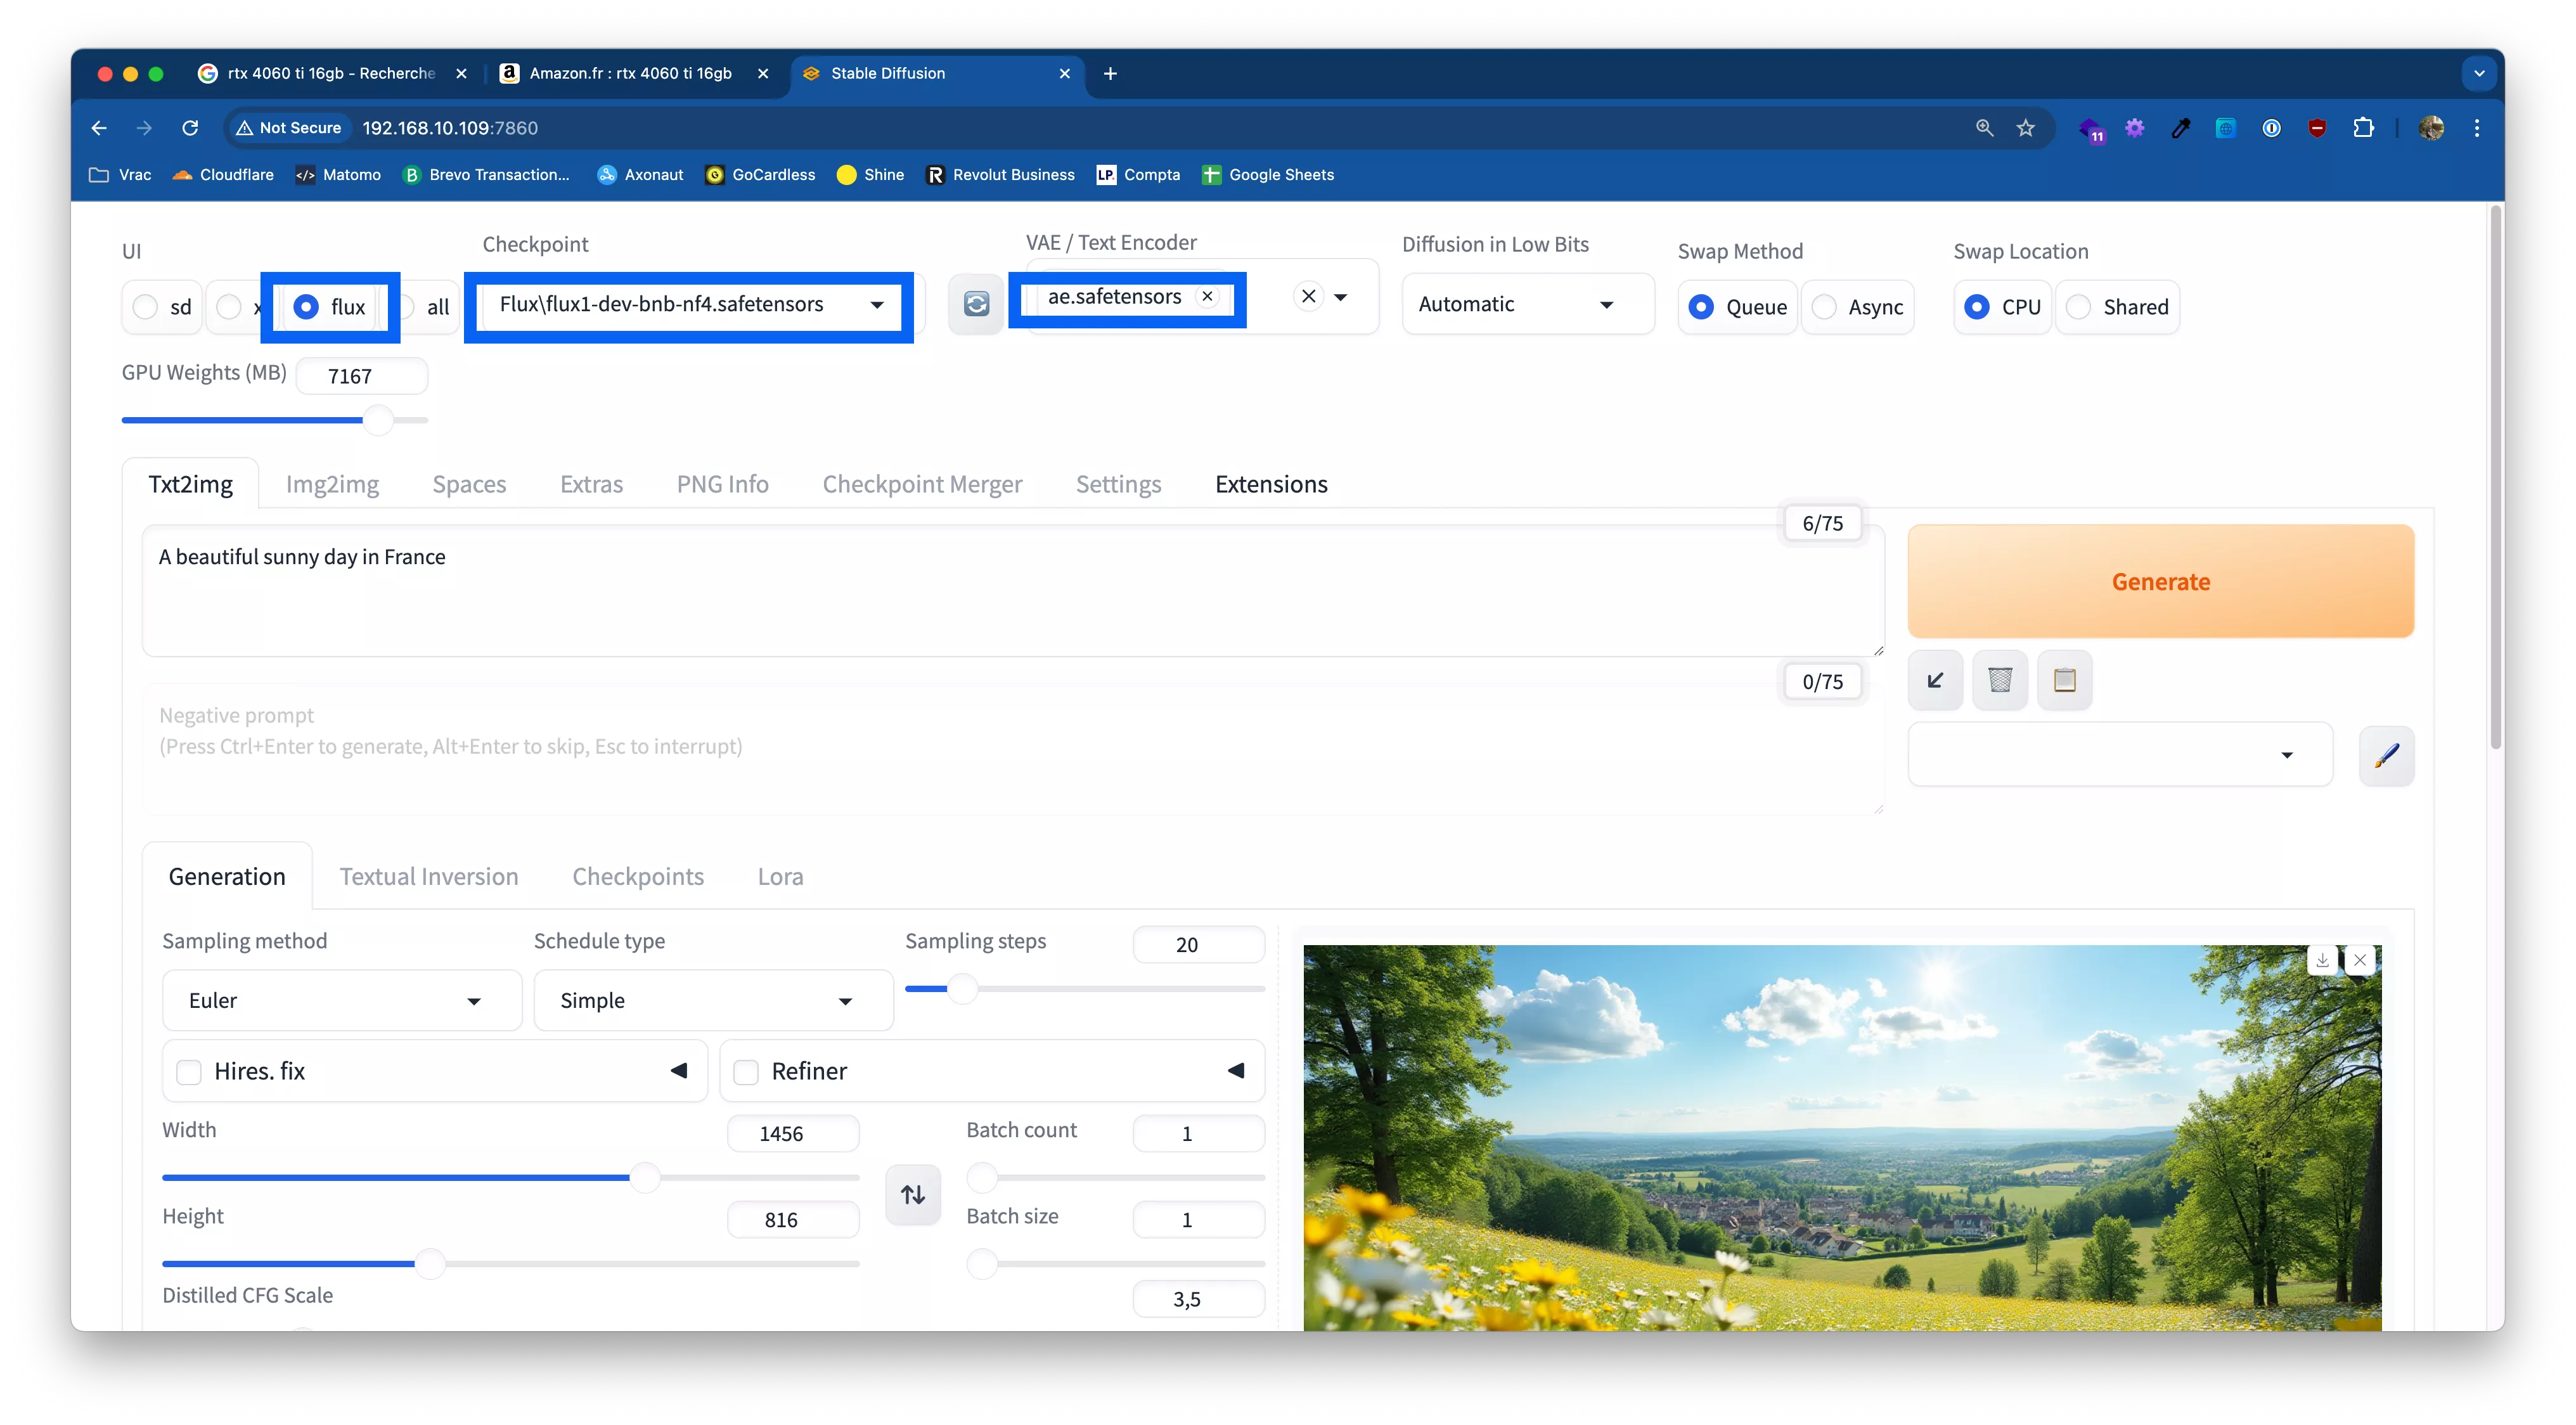
Now all you have to do is enter your prompt and click on "Generate".
A few tips
WebUI launch parameters
You can modify the WebUI launch parameters. To do so, click on the cogwheel in the Stable Diffusion Web Ui Forge insert on the main StabilityMatrix screen. Here you can add parameters: either reconfigured parameters, or, further down, you can add your own parameters verbatim, for example, the "--api" parameter.
If, like me, you have an Nvidia card, you can boost performance by enabling the --cuda-malloc launch parameter. This will generate your images more quickly.
In general, if you read the WebUI logs, you'll have some idea of what to enable.
Stable Diffusion WebUI Forge API with Flux
If you try to use the API (with the "--api" parameter), it may generate black images (if not corrected by then). During my tests, I saw several "GitHub issues", some of which I've since deleted, that said it's because via API calls, you can't choose the "ae.safetensors" file. All this being relatively new, there's a lot of movement... the proof being that the issue I'm talking about can't be found as I write these lines.
If you have any more info on this subject, please let me know on the networks 😁. If there's anything new, I'll update this section.
Couldn't get it to work on my Mac
Well, I didn't look too long, but on Apple Silicon, I had chain errors in the console when I wanted to generate an image, given that it works on the RTX 2070 (slowly but surely), I didn't look any further...
Conclusion
And that's it, the article comes to an end, you can now experiment with Flux locally... As far as I'm concerned, I had a lot of fun with it, and I'm thinking of getting a bigger card to play even more... (yes, you've seen on some screenshots !talked about RTX 4060 TI 😮).
Good luck with your re-entry and see you soon 😁.